 Last week, I showed you how to quick capture on your Mac using nvALT. In part 3 of this series on quick capture, I want to show you how to quick capture on your iOS device using Drafts.
You can watch the screencast which has step-by-step instruction on how to set up Drafts or you can read along with the text underneath the screencast.
This is the most important part of my quick capture workflow because many times I can’t choose to wait until I get back to my Mac to write something down – if I put it off, there’s a good chance I’ll forget about it completely. If I’m not at my Mac and I need to remember something, I make sure to immediately write it down (quick capture it) and the way I do that is with an application called Drafts.
Drafts is made by Agile Tortoise (makers of Terminology and Phraseology, 2 more great apps for writers wanting to go iPad only) designed specifically for quick capture on iOS. Their tagline is “Drafts – where text starts on iOS” and this really has proven true for me. Anytime I want to remember or write something, the first thing I do is open Drafts. It has permanently earned a place on my dock because I use it that much. For example:
- Anytime I need to remember something – Drafts
- Anytime I need to take a quick note – Drafts
- Anytime I want send a text – Drafts
- Anytime I send an email – Drafts
- Anytime I want to post to social media – Drafts
- and so on – the possibilities really are endless!
Let me give you a practical application of Drafts. Have you ever started typing out a text message and then realized that it was getting WAY too long to be a text message and would really be better as an email instead? To get your message out of the Messages app and into your email application can be frustrating on iOS and is cumbersome at best. You have to first select and copy all the text you want, then open the application you want to put your text into, and paste that text in that application – all using your index finger, which can be quite difficult on a smaller iPhone screen.
With Drafts, you can type out your message first and then easily export to whatever application you want. You can even send it to multiple applications, which is especially useful when posting to your social media accounts (rather than copying and pasting the text into each account). Drafts allows you to quickly capture text and output it almost anywhere, so you don’t have to decide folders or file names before you get your thought “on the paper and off the mind”. As we talked about in Part 1 of this series, the goal of quick capture is to just write things down and get them into our trusted system so we don’t have to cognitive resources dealing with that thought anymore. We can come back later to process and organize that information, but it’s important that the first thing we do when we have is just get it recorded so we can deal with it appropriately later.
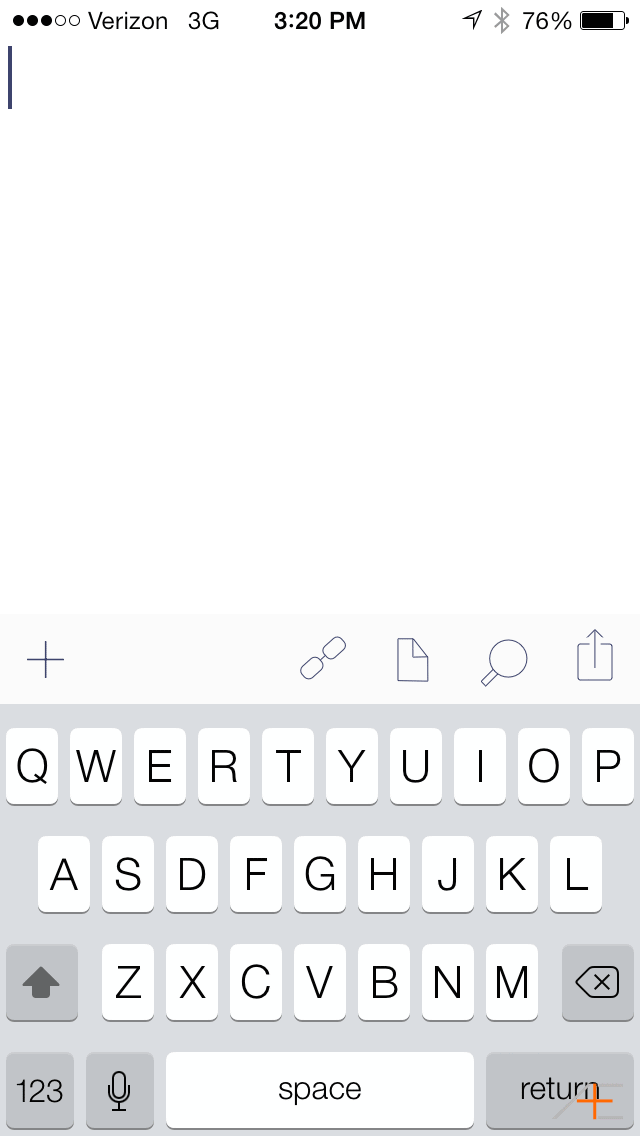
Fortunately, Drafts makes it incredibly easy to quick capture information. When you first open Drafts, you’re presented with a blank “draft”. Just open Drafts and start typing.
If you’re not sure what to do with your text, you can leave Drafts without “saving” (it will be saved automatically for you). Drafts has a history feature where the most current drafts are sent to the top of the list, just like a stack of papers. You can access your drafts by swiping from the left side of the screen on the iPad or by pressing the “magnifying glass” icon on the iPhone, which will open up the “search” window.
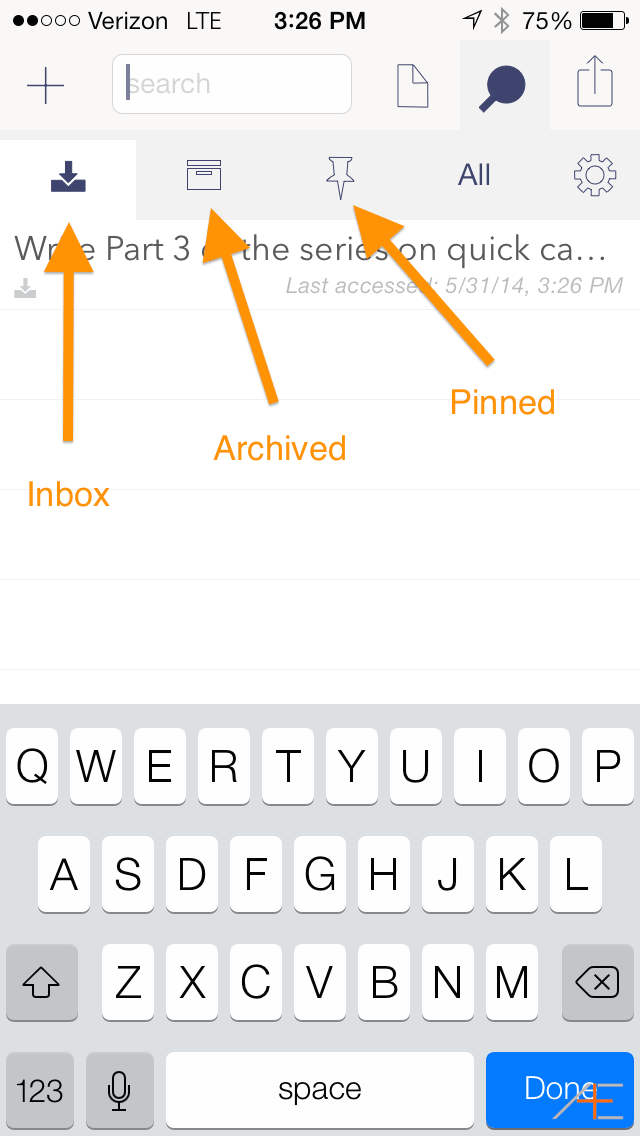
There are 4 different tabs available within the “search” window in Drafts:
- Inbox – this is where your drafts go by default. Your Drafts inbox should be processed regularly just like any other inbox (email, Omnifocus, etc.)
- Archive – once you’re done with a draft (you’ve sent it somewhere), you should archive it to get it out of your inbox. When you do, it will go here.
- Pinned – this is where your pinned drafts go. You can pin a draft to set it aside to deal with it later or mark it as important.
- All – this shows all your drafts, no matter what state they happen to be in.
On the iPhone, there’s also a gear icon (which will take you to the app settings). Once you open up the “search” window, you will be looking at your Drafts “inbox” and you’ll see a list of all your drafts. If you want to process a draft, you can either swipe on the draft from right-to-left to delete or from left-to-right to archive or pin.
If you press on the draft itself, it will open that draft. From here you can edit the draft and any changes you make will be automatically saved.
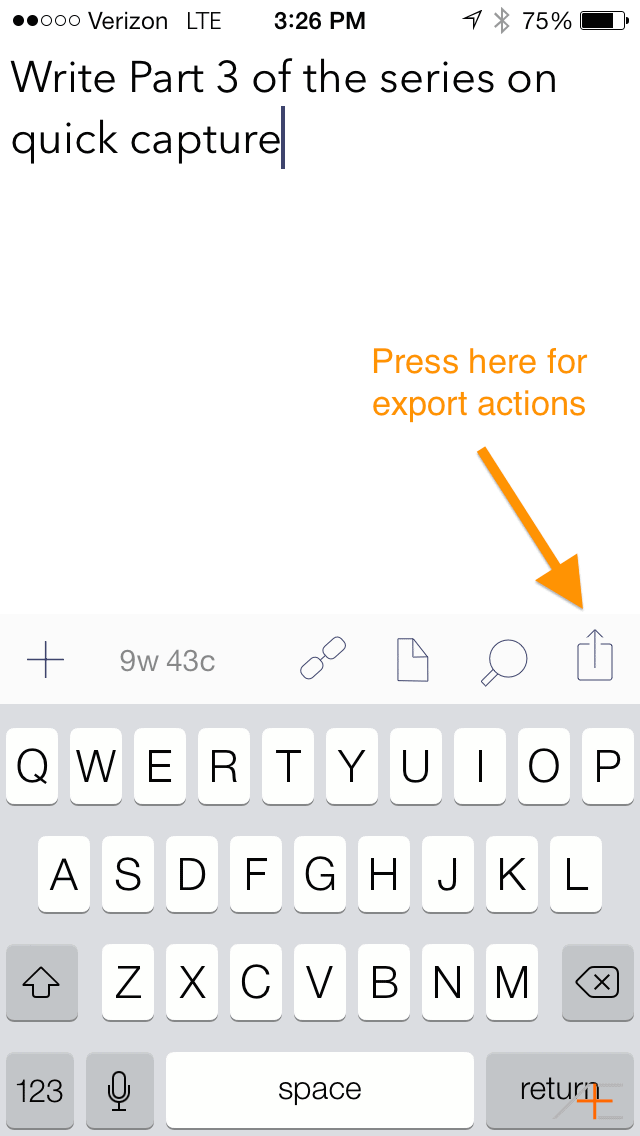
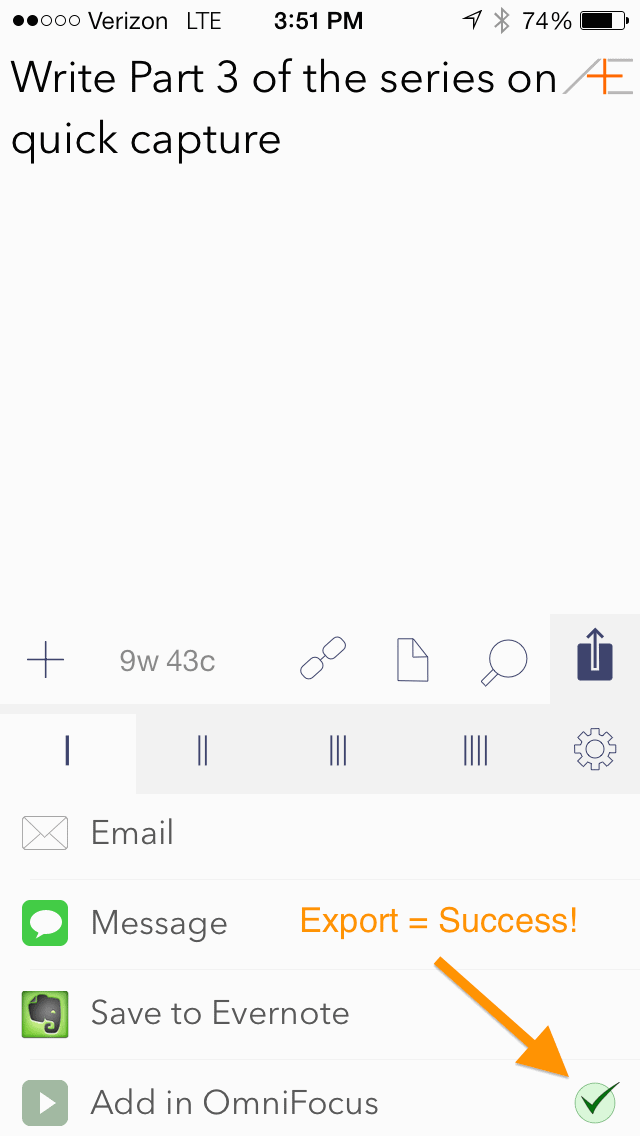
Once you’re finished editing, you can export your text using an “export action”. To access the export actions, press the “Export” button and the export actions menu will appear. This allows you to send your text to just about anywhere.
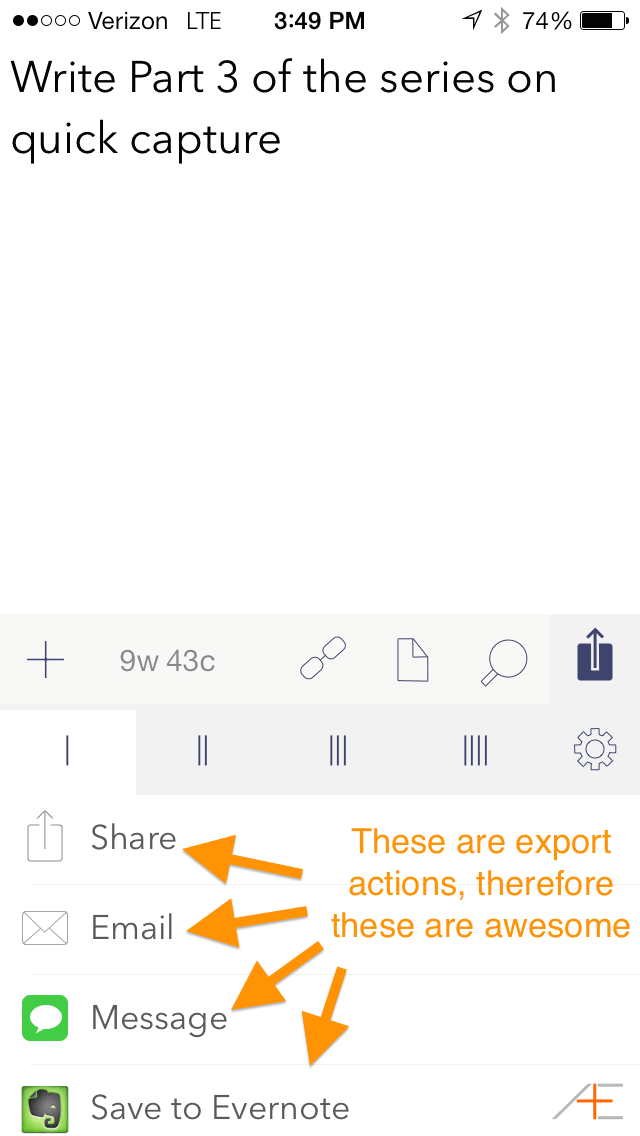
There are 4 tabs that you can assign export actions to. By default, several export actions are pre-populated for you under the first tab including Twitter, Facebook, Evernote, Email, Messages, and more. What makes Drafts really useful though is the ability to create your own export actions. You can do this under the “Settings” menu (the gear icon). I’ll show you how to set these up in Part 4 of this series next week. Once you press the export action you want to use, Drafts will open the appropriate application and send your text there automatically. For example, if you wanted to send your Draft text to Omnifocus, pressing the “Send to Omnifocus” export action will open Omnifocus and paste the text in a new task window.
You can also post directly to your social media accounts in Drafts. Because iOS can store your social media logins, this doesn’t even require another app to open – for example, posting to Twitter will automatically post the tweet from the appropriate account. If you want to export it somewhere else also (like Facebook or Google+), just select another export action – it’s that simple. Drafts will show a green checkmark icon next to each export action that’s been used with this draft.
These export actions may not seem like a big deal, but trust me – they are. Use them for awhile and you’ll soon wonder how you ever managed text on iOS without them. I can’t over-emphasize how incredibly awesome export actions are – once you develop the habit of starting all your text generation on iOS in Drafts, this will save you a ton of time.
Os that’s the basic idea of how to use Drafts, but here are a couple more tips for adapting Drafts to fit into your workflow and make it even more useful:
Pro Tip #1: Limit the number of export actions you see
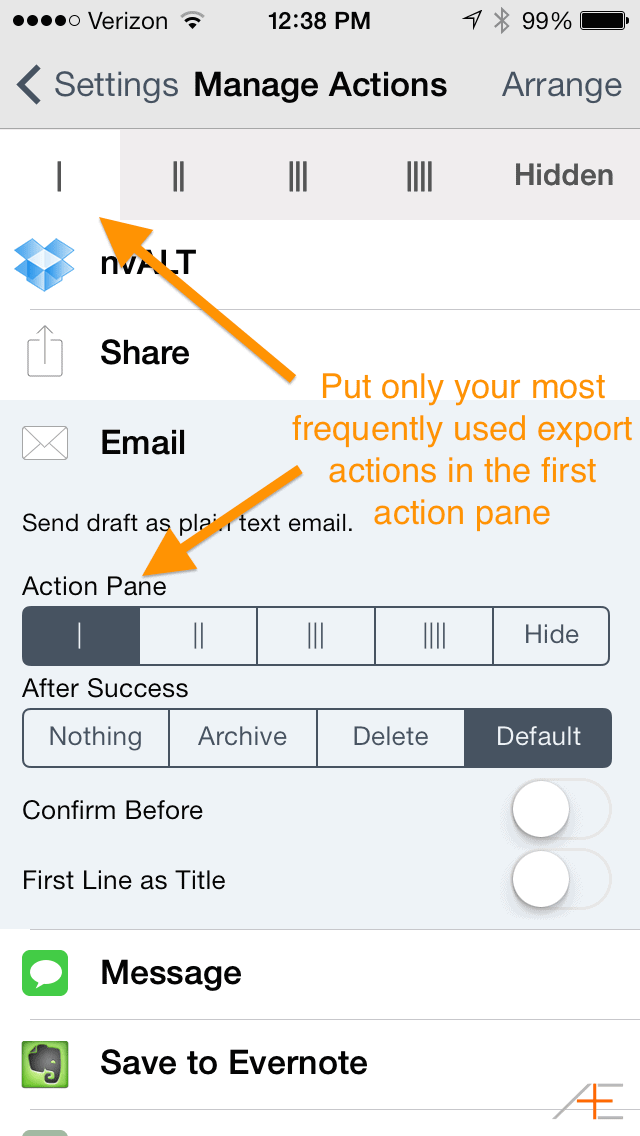
Drafts has a ton of export actions, and has a lot of them available right out of the box. If you’re unfamiliar with Drafts though, you can look at that long list of export actions and easily be overwhelmed by all the options. Most of these you’ll never use, so I recommend going into the settings and hiding all the actions that you won’t use. At the very least, move them off the first page (remember, Drafts supports 4 pages of export actions). You really only want to see the actions you use frequently on the first page.
To do this, press the “export” icon, then press the “settings icon”, and then scroll down and press “Manage Actions”. Next, select the action you want to move and select the action pane you want to move it. There are 4 action panes available in Drafts, or you can select “Hide” if you don’t want to see this action at all.
Organizing your export actions like this doesn’t seem like a big thing, but remember that removing every possible source of “friction” from your workflow is very important.
Pro Tip #2: Customize your export actions
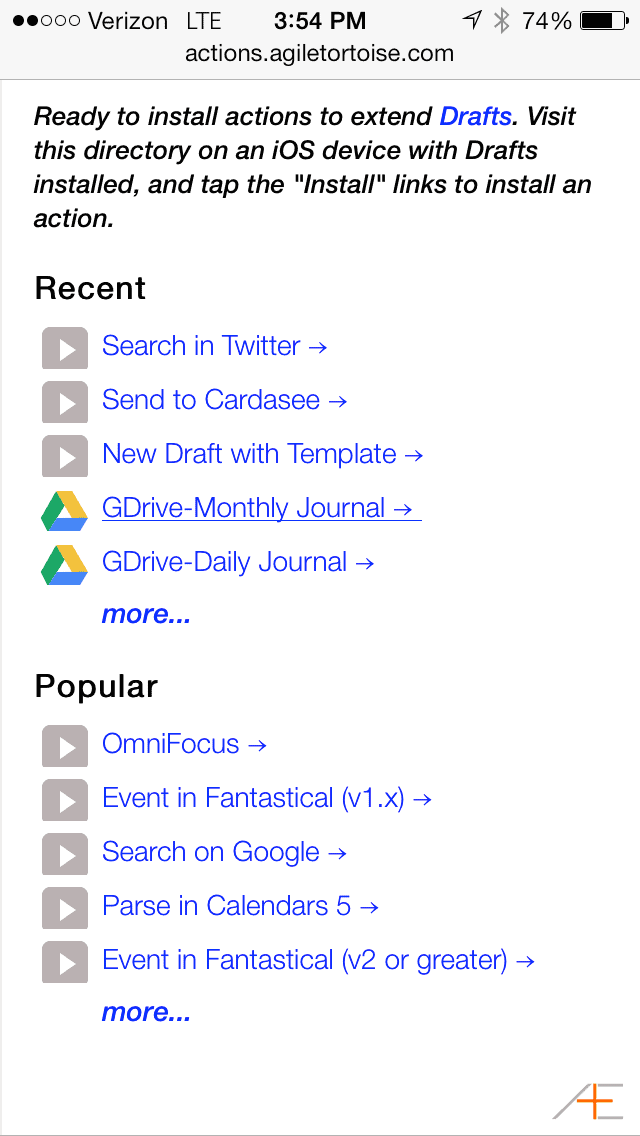
Drafts has a lot of export actions that is supports out of the box, but there’s actually a directory of export actions that you can add to Drafts (you can access this site by clicking the “settings” icon and selecting “Visit the Action Directory” from inside the Drafts app as well). If you launch Drafts and your favorite app doesn’t seem to be supported, check this directory – there are hundreds of export actions available here that you can install just by clicking the “Install” link on your iOS device.
The number of applications that Drafts integrates with is astounding. It does this by supporting “URL schemes”. These can be used in conjunction with apps like Launch Center Pro to automate just about anything on your iPad. It’s a bit technical and not the focus of this series of articles, but it would be doing Drafts a disservice not to mention this feature. This flexibility allows Drafts to be adapted into pretty much any iOS workflow – if you’ve got a crazy-awesome Drafts workflow, let us know!
Pro Tip #3: Use badges to show unprocessed Drafts
Fundamentally, Drafts is an inbox and you need to process it as such. Quick capturing information doesn’t do you any good if you never take the time to follow up with it and process the information (we discussed this and the 5 steps of the Getting Things Done methodology in part 1 of this series). By turning on the “Show inbox count as badge” setting, you’ll know when you have items in your Drafts inbox that need to be processed without even opening the app.
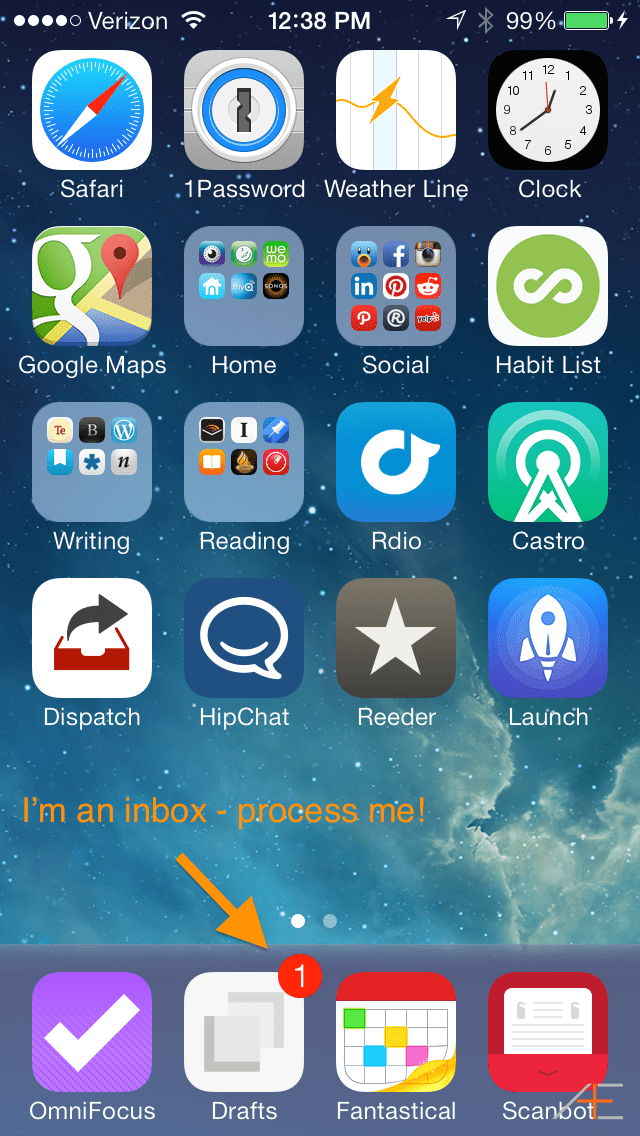
Pro Tip #4: Put it in your dock
This is a general tip for any new app that you consider adding to your workflow. The best way to see if something “sticks” is to put it on your dock and see if you actually use it.
If you put it in your dock and still don’t find your self using it after awhile, that’s ok – there is no single “correct” workflow. Don’t be afraid to try something and say “it’s just not for me”. But if you’re still reading, there’s a pretty good chance you’ll love Drafts.
So that’s how I incorporate Drafts into my iOS workflow. In Part 4 of this series, I’ll show you how to set up Dropbox actions in Drafts so you can send your quick captured text to nvALT on your Mac and process it there. Tune in next week!