


If you have been thinking about of going iPad-only or making your iPad your main computer – you’re not alone. I’ve been going through similar thoughts and for a few weeks I’ve been experimenting with going iPad-only.
I’ll be going over my experience with using the iPad as my main workstation and how you can make the iPad an integral part of your day-to-day workflow.
Here’s a quick summary:
- Prepare your iPad for cloud sync with the right apps and platforms.
- Get yourself an external keyboard.
- Going iPad-only is totally possible with a few caveats.
Why go iPad-only?
Let’s get the obvious question out of the way first: why would you want to go iPad-only?
I’ve wondered the same thing and my take on it is:
- Mobility – carrying a iPad is much easier, faster and convenient for a lot day-to-day work.
- Travel light – taking a laptop with you can be overkill for lots of trips. Going iPad-only can save you a lot of back-pain, hassle and storage.
- Cost – iPad is much cheaper than a laptop.
There are lots of benefits but you won’t truly value them unless you try going iPad-only for a while. It wasn’t until I went iPad-only every Friday of the week when I realized how awesome it was.
Quick Background
Before I dive in the raw material, I want to add some context to this article and give you some background info of where I’m coming from. This will give you a better idea how this article can help you and where my approach to work might contrast with yours.
- Device: iPad Air and iPhone with unlimited tethering.
- I work full-time for Asian Efficiency from home on my 15″ Macbook Pro hooked up to a 27″ monitor.
- Everyone on the AE team works remotely and in different time zones.
- On a day-to-day basis, my work mainly involves writing, training team members, designing and tuning systems, product development and customer support over email.
- Before my iPad-only experiment, 90% of my iPad usage was reading Kindle books and Instapaper articles. The remaining 10% was either watching YouTube, Netflix or playing games.
- Mon-Thu I would work on my desktop.
- Every Friday I would take my iPad with me and work from coffee shops or Whole Foods for the whole day.
Notice that I didn’t completely go iPad-only. Instead, I went one day a week iPad-only to prove that it is completely possible to do all the work you need to do on a tablet.
The majority of my work involves writing. 80% of my work is writing training materials, (technical) documentation, email newsletters and blog posts. One day a light bulb went off and I realized I could do most of my work on the iPad. That’s when I started experimenting and now I’ll be sharing some of the things I’ve learned along the way to help you get set up on your iPad.
Preparing Your iPad
With all that background info out of the way, let’s get started with setting up your iPad. I’ll go over the basics first and provide some intermediate/advanced ideas later on.
Cloud Infrastructure

A lot of people are concerned that when they go iPad-only, that they won’t have access to files that live on their desktops or laptops. That’s a valid concern and one that can be easily addressed with a “cloud infrastructure”.
That’s why the first thing you want to do is have a cloud infrastructure. This simply means that you have to get used to storing your files “in the cloud”. Not on your local or external hard drive but somewhere on the Internet that only you have access to.
There are lots of solutions out there and I recommend Dropbox for this over iCloud. The main reason is that Dropbox still preserves a file structure and hierarchy. For my kind of work, I need to deal with a lot of different files that are organized in a specific way so that everyone on the team can easily find and access.

iCloud is really good for personal use and if you don’t mind clustering your files but if you are someone who likes to organize files and share it with people – go with Dropbox.
Another reason to pick Dropbox is that most iOS apps support it. This makes it easy to build your ecosystem (we’ll get into that) so everything just… works.
Since this post is focused on the iPad, I won’t go too deep on the cloud setup on my computer but here’s a quick summary:
- Make Dropbox your “main hard drive” where you store all your files (photos, documents, etc).
- The only thing I store locally on my desktop is anything I’m downloading in the Downloads folder, app installs and movies. The rest goes into a Dropbox folder.
- I have Dropbox Pro with 140GB that I happily pay $99 every year for.
- I also have Dropbox for Business (unlimited storage) that we use internally at Asian Efficiency for sharing files among the team.
- Any file that’s big and I don’t use on a regular basis gets transferred to an external hard drive. That way I preserve space on Dropbox and my local hard drive. Plus I won’t be uploading for days (uploading 4GB raw video files is no fun).
This cloud infrastructure is really key to being able to go iPad-only. The days where you had to email yourself files are gone. Imagine each time you go out and you forgot to email yourself a file… I’d probably kill myself by the 3rd time.
Remember, all files you deal with on a daily basis needs to go in the cloud. Just having Dropbox and using it to share stuff won’t cut it. Literally every photo, text file, PDF, etc needs to automatically go in the cloud. That way you don’t have to ever think about “where should I store this: Dropbox or some folder on my hard drive?”. The default answer is always Dropbox.
Internet Access
A quick word about Internet access. When you store everything in the cloud, you will always need to have an Internet connection to access your files. If there is one downside to going iPad-only, I’d say this is it.
I’m fortunate enough to live in America where most places provide WiFi and in worst case scenario, I can use tethering on my iPhone that has unlimited data. So wherever I go with my iPad, if I need Internet access I can either find a WiFi hotspot or simply tether the data connection on my iPhone – so I never really worry about not having an Internet connection.

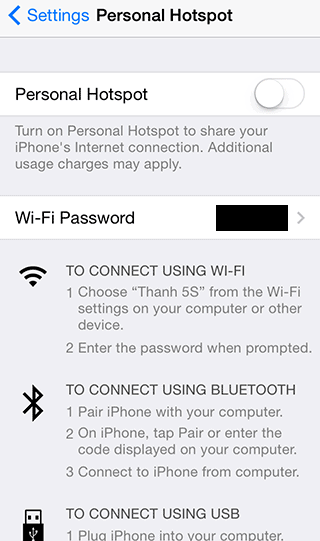
If you’re planning to go iPad-only, it’s worthwhile getting tethering enabled on your phone plan and paying for extra data. For an extra $10-15/month it’s totally worth it.
Some of you might also want to consider getting a separate data plan for just your iPad if you need it on-the-go but in my case that’s not necessary.
Note: Aaron tells me that he pays 99 baht (USD$3) a month for unlimited wifi across most of central Bangkok.
The One Online Platform You Need
Okay so at this point you have Dropbox and a reliable way to get Internet access. The next step is get the right online platform for syncing information (I’ll cover apps in the next section).
This is an extension of having a cloud infrastructure. Remember, we want to have everything in the cloud. Besides files and document, this also means things like notes, calendars, emails and such. We want to be able to sync as much data as we can over the cloud.
Another way to think about it is “if I change something on my iPad, by the time I get home, my desktop should be all synced up too and I can continue where I left off.” The closer you get to this ideal, the better.
You have Dropbox for syncing files but you also need another service to sync things like your email, calendar and such. My #1 preference for this online platform is Google Apps for Business. We use it at Asian Efficiency to host our email, calendar and other services. I honestly haven’t explored other platforms that much because Google Apps just works really well for us.

All emails are synced over IMAP. I can clear emails on my iPad and when I get home all emails are also sorted on my desktop. Same thing for my calendar. When I add or edit an appointment on my iPad, it will be synced up on my desktop and iPhone.
Google Apps simply works and it’s worth the investment if you use it for your business. For personal usage, just having a Google account will take care of everything. Just sign up for a Google account (if you haven’t already) and start taking advantage of their services (I’ll assume you know how to do that).
As far as notes go, I use nvALT with Dropbox for my notes and you can find a basic setup in this post we released a while back. For most people, I would recommend Evernote which stores all notes in the cloud. I still use Evernote but most of it is for clipping web pages and storing checklists. Most of notes go into nvALT and on the iPad I use Drafts to capture notes and Notesy to edit them directly from Dropbox (it’s very rare I do that but just in case).
The Apps You Need
Now that you have your cloud infrastructure, the next thing you need are the right apps.
Everyone will have different needs that require different apps. Earlier I laid out what my work looks like so my apps might differ a lot from yours.
However, there are a couple guidelines you should follow when it comes to picking apps:
- Mirror the apps you use on the desktop with the ones on your iPad.
- Desktop apps that have native iOS apps have preference over third-party apps that have the same functionality.
- All apps that deal with files must have Dropbox support.
For example, my task manager is OmniFocus. Thus, I’m using the native OmniFocus iPad app too. This avoids any data conflicts and corruption. There are rare exceptions to not using the native app on the iPad, i.e. on the desktop I use MindManager but on the iPad I use iThoughtsHD.
It’s also very important that apps support Dropbox so you can easily access anything you want to work on. I’ll take a sub-par app with Dropbox support over a superior app with no Dropbox support.
So for those who are curious, here’s my home screen on the iPad.

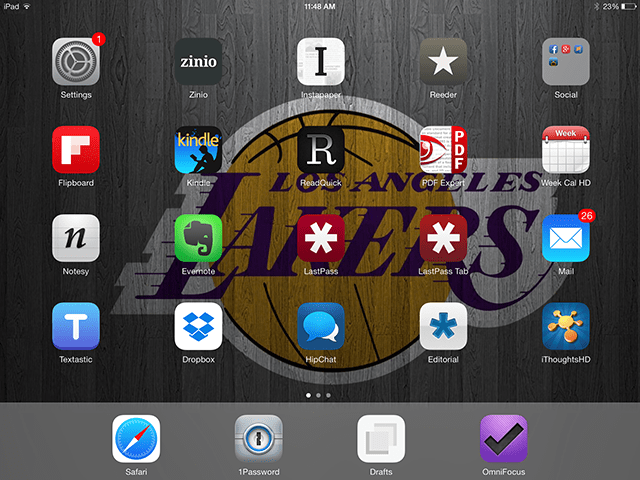
Here’s a list of apps I use the most:
- Editorial – for writing content (has lots of automation features)
- Week Calendar HD – manage my calendar
- Slack – instant messenger we use at AE
- Textastic – coding and HTML editing
- Drafts – capturing quick stuff and notes
- Evernote – for reference materials
- OmniFocus – my task manager
- 1Password – my default browser nowadays for personal use
- LastPass – we use LastPass Enterprise at AE for sharing passwords
- PDF Expert – PDF reader and basic PDF manipulations
- Dropbox – my “Finder” on the iPad
- iThoughtsHD – to open and edit mind maps
- ReadQuick – learn speed reading with your Instapaper articles
- Notesy – to directly edit text files in Dropbox
- Mail – default email client
Other Hardware and Accessories (Optional)
To get the most out of your iPad, I would recommend that you get some additional hardware and accessories. I do want to say that these are optional but with them you’ll be much more effective.
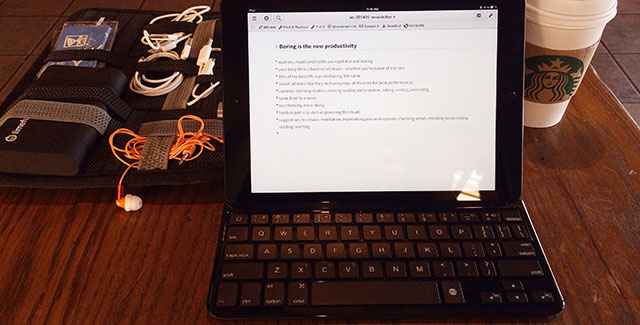
The first investment is an external iPad keyboard. This will make typing a lot easier and faster. Plus, when you have a keyboard you can use tons of keyboard shortcuts that you wouldn’t be able to use otherwise. Copying, pasting, browser back, browser forward… all these little keyboard shortcuts can make working on the iPad more fun, convenient and efficient.
Now there are lots of iPad keyboards available but the one I have is the Logitech Ultrathin. It acts like a keyboard and screen protector at the same time. I’ve also tried a Zaggkeys Folio but returned it because 1) sometimes I couldn’t swipe up the control center with parts of the keyboard blocking the screen and 2) it’s bulkier than Logitech’s Ultrathin.

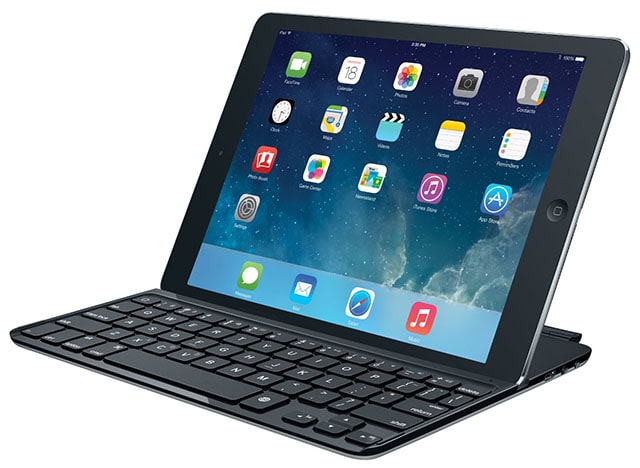
I was a little skeptical about the Ultrathin due to some reviewers mentioning the weak stability and such but I’ve never found any issue with mine. I love it and it makes working on the iPad fun. I also got compliments on it from women at coffee shops so that definitely helped too ;)
The second accessory I would recommend is an external battery pack. When you use your iPhone and iPad a lot, you can’t afford to have a battery die down in the middle of a workday at a coffee shop. Especially when you’re tethering and streaming music in the background – both require lot of battery power.

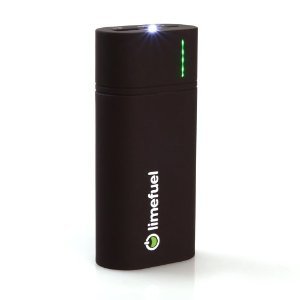
The one I have is Limefuel 15600mAh. It can charge your iPhone and iPad at the same time – it’s wonderful and I’ve used it many times already at conferences, on the plane, at airports and coffee shops. You can’t go wrong with this one.
The third accessory is a Grid-It (there are lots of models but the one I have is Cocoon 11″ Grid-It Accessory Organizer with Pocket for iPad). I’m not sure how to describe it this image below says it all:

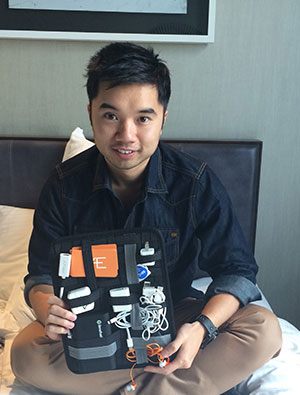


I can easily carry my Limefuel, cables, adapters and such with it. My model also has a pocket in the back where I can slot in my iPad with the Logitech Ultrathin keyboard. When I go iPad-only to the coffee shop or Whole Foods, I have my iPhone in my pocket and all I take with me is the Grid-it.
It’s also great for travel. My backpack is so much easier to manage now. Before I had all these tangled cables and it would make things hard to find but now it’s all nicely ordered thanks to the Grid-it.
Summary: Pros and cons of going iPad-only
After going iPad-only for a number of months, I have a pretty good idea what the pros and cons are.
My take on it is that the desktop (Macbook Pro in my case) is still superior in every aspect. I simply get more work done and I’m much more effective. There are a couple reasons for this:
- I know all my desktop apps inside-out. I know the shortcuts and I can easily navigate around. When you’re a keyboard shortcut junkie like I am, you’ll really dislike the lack of keyboard shortcuts on the iPad. That was my main frustration.
- Some things just have to get done on a more powerful machine. Things like editing images, video editing and rendering, organizing my OmniFocus – all these things are much better done on a desktop than on the iPad.
- The iPad doesn’t support that much automation. When you’re used to using TextExpander, Keyboard Maestro and Launchbar on the desktop, you’ll find it challenging to be super effective on the iPad and tapping on the screen feels like going backwards. I’d say I’m an outlier in this aspect as most people reading probably won’t find it an issue.
With all that said, there are lots of things I did like about going iPad-only. The biggest is the constraints you have. While I just mentioned all the things I missed on the iPad, it also forced me to focus much more on the task at hand.
On the desktop I can easily switch windows with CMD+Tab or get easily distracted by random things but I find that on the iPad I don’t have that. Multitasking on the iPad takes more effort which forces you to single task and that’s a good thing. I got more writing done, my quality of writing went up and I was more efficient at doing the simple things because I couldn’t multitask.
The other big benefit is the mobility you have. I literally can pick up my iPad and go anywhere to get work done. I love that and it makes me more productive knowing I can work wherever, whenever. With my laptop I have to be more careful and use my backpack. I will only do that when I need to do some heavy stuff but otherwise I’d prefer the iPad.
So that’s my approach and setup for going iPad-only. Let me know how you plan to use your iPad and if you have any questions, leave a comment behind and I’ll try to answer all your questions.
Next Actions
Do you want to see more examples of our personal systems and workflows? We reveal them all on our 3 Lifehacks seminar. It’s completely free and you’ll get to see the exact step-by-step systems and workflows that we personally use to be insanely productive. Register for the next available seminar here.