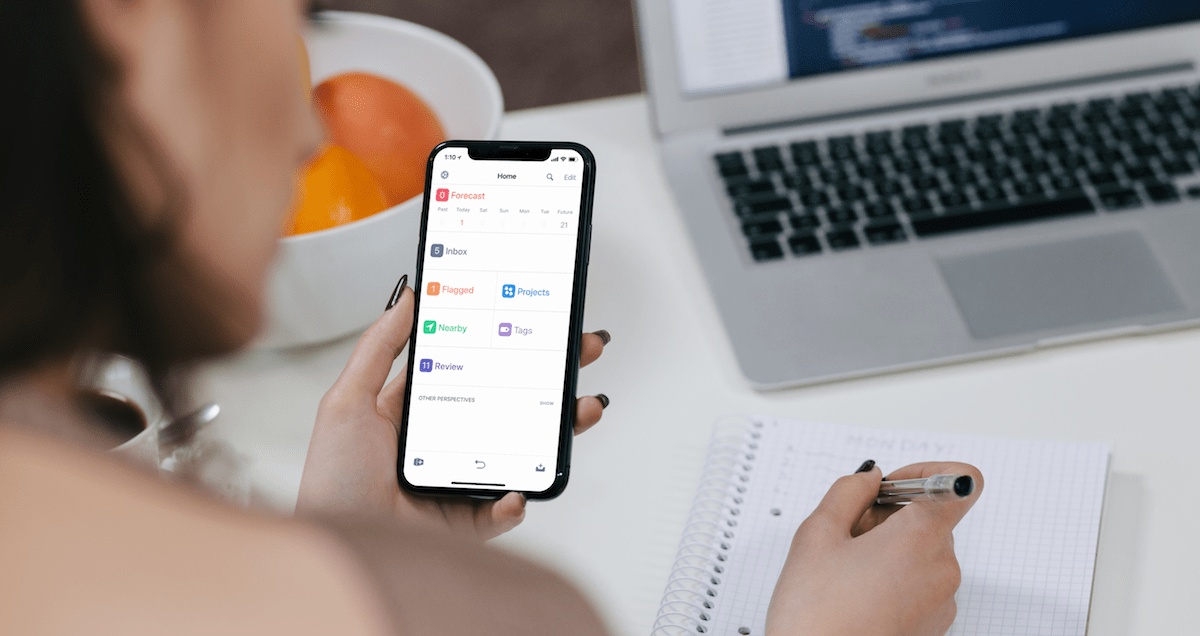
OmniFocus 3 for iOS is out, and there’s a ton of new stuff to make focusing on the right tasks at the right time even easier. In this post we walk you through some of the major changes in the iOS version (as of this writing the Mac version of OmniFocus 3 isn’t out yet), we explain why you should care, and we show you how we recommend you set things up for maximum productivity using the AE Task Management Workflow.
Why you should consider OmniFocus
OmniFocus is definitely not the cheapest task management solution out there. But in our opinion, it is the best – for most people. Fortunately, there are lots of other options available to you to fit the way you work. If OmniFocus isn’t your cup of tea, check out this post on the 5 different level of task managers to figure out which one is best for you.
But if you’re like many of the people we work with here at Asian Efficiency, you have too much to do. You can’t keep it all straight, and you’re stressed out about trying to get everything done. This is where a tool like OmniFocus can really help you out.
The power of a task management system like OmniFocus is that it allows you to filter your tasks instantly and show you only the things you should be thinking about right now. It frees up your brain to focus on what you’re doing instead of trying to keep track of all the loose ends that are hanging out there. This reduces stress and allows you to single-task, resulting in greater efficiency and increased effectiveness. In other words, having a system you can trust allows you to work better AND faster.
Getting Started
If you do decide to give OmniFocus a shot, there is a 2-week free trial when you download it from the App Store. After the free trial, it is $39.99 for the standard version or $59.99 for the Pro version. The Pro version ha a couple important features that the Standard version doesn’t:
- The Forecast Tag – this allows you to include tasks with a specific tag in your forecast view, giving you more options for looking at the work you want to get done today.
- Custom Perspectives – this is the big one. This allows you to create your own perspectives for looking at your tasks and planning your work.
In this post, we’re going to show you how to set up a work planning perspective. We’ll show you exactly what settings to use, but this perspective will require the Pro version.
Now let’s dive in to what’s new in Asian Efficiency’s favorite personal task manager.
Tags(!)
Tags are a big change from traditional GTD contexts. With tags, you are able to overcome the single biggest limitation with previous versions of OmniFocus:
The inability to have more than one context.
Most of the time, this wasn’t a big deal. The forced constraints of a single context made you think through what was really necessary in order to complete the task. In our experience, these contexts tended to fall into 1 of 3 categories:
- Places – a location you needed to be to get something done
- People – a person you needed to be with to get something done
- Tools – a thing you needed to have to get something done
But there are scenarios when you really do need multiple contexts. As we worked with people to help them get OmniFocus set up, they would present things that were hard to classify into just one of these buckets. For example:
- I need to record a podcast at my computer (tool) with Thanh (person)
- I need to take my brother (person) to the new hipster coffee shop (location)
- I need to record Joel (person) playing a drum track for a new song on my MacBook (tool) at church (location)
We used to get asked about this all the time. Occasionally, we wouldn’t know what to tell people to classify something as. Our general advice was “pick the one that makes the most sense to you.”
One of the hacks around this was to use sub-contexts (a context within a context, like “Personal > Do” or “Errands > Grocery Store”), but this isn’t necessary with tags. In fact, if you’re used to using contexts like this, we recommend that you flatten out your context structure so that is only a single-level deep. The reason for this is that by having multiple levels, you will greatly increase the number of tags you need because the same tag will exist in multiple places in your hierarchy. For example, I might have all of the following using traditional contexts:
- Rachel
- Waiting For > Rachel
- Email > Rachel
- etc.
And when I start typing “Rachel” to apply a tag, I’ll see ALL of them. But if I keep all my tags on a single level in my hierarchy, I can find what I’m looking for a lot faster.
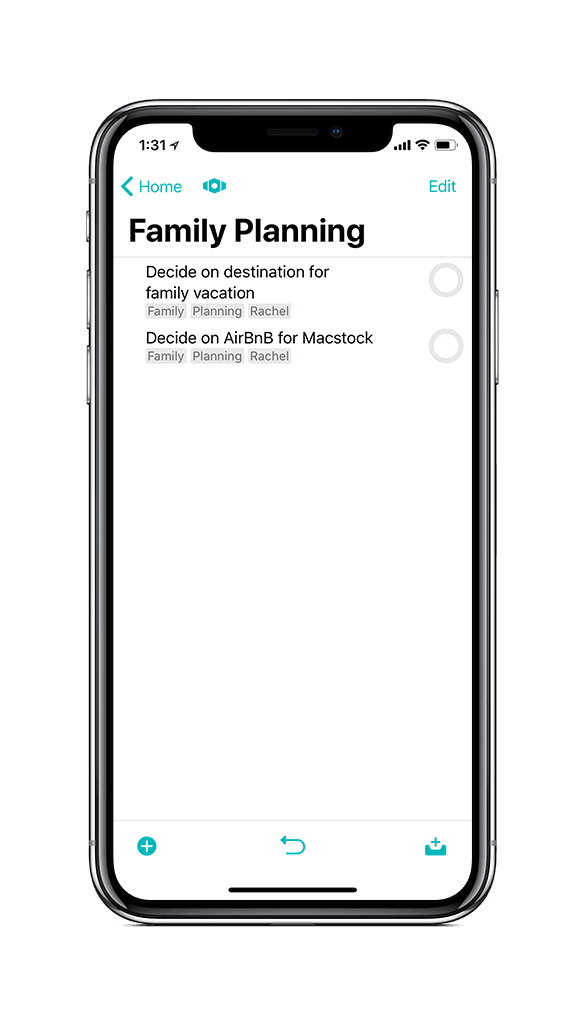
The big advantage of tags is that you can combine any number of tags to quickly filter which tasks OmniFocus shows you. For example, I could select a tag of “Family” to see all the tasks related to my family, then select a tag of “Planning” to see all the tasks we haven’t made a decision about when to do them yet. And finally, I could select a tag of “Rachel” to see all the tasks that my wife and I need to decide about together when we have our next family meeting.
If you want more examples of how powerful tags can be, check out this podcast episode where Thanh interviewed Evernote expert Charles Byrd. Charles gives some great examples of how he uses tags to find what he needs in seconds.
Some additional tips for creating tags:
- Don’t use spaces. All your tags should be a single word to make them easier to remember and find.
- Keep your tags singular. This will avoid duplicate tags and increase the chances of you finding what you need (i.e. “Song” & “Songs”).
- Rely on autocomplete. Use memorable prefixes to take advantage of the autocomplete feature and find your tags quickly.
What if I use OmniFocus 3 for iOS and OmniFocus 2 for the Mac? How does the sync work between 2 totally different systems?
You can use the full power of tags on your iOS devices, but the Mac version still supports only a single context. Fortunately, the Omni Group actually has a pretty genius workaround for this. The Mac version of OmniFocus 2 will take whatever tag appears first on your task and display that as the context. While it’d be great to use tags in OmniFocus for your Mac, IMHO this is an acceptable solution while the team finishes the Mac version.
Updated Forecast view
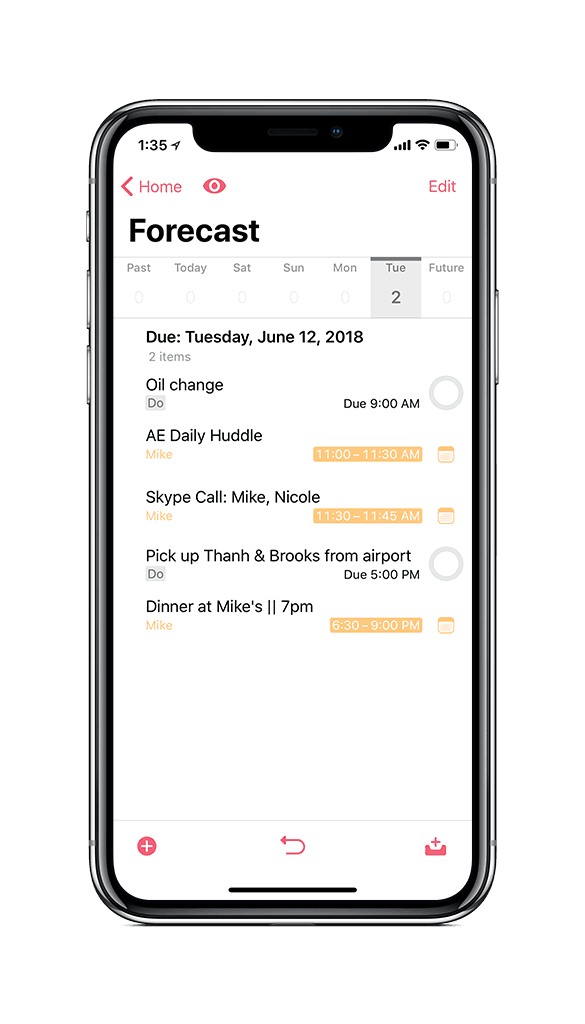
The Forecast View has also gotten an overhaul in OmniFocus 3 for iOS. There are several new features that make it easy to see what work you need to do today at a glance.
The first new feature is better calendar integration. The Forecast View now displays your calendar data in the appropriate time slots. This allows you to see your tasks and calendar events inline and gives you a much better idea of what you need to work on when. For example, if you have a task that is due at 10:30am and a meeting from 10am-11am, The Forecast View will display the task first and then the meeting (since you would need to finish the task before the meeting started.)
The next new feature is the ability to display deferred items in your Forecast View. These don’t get added to the list with the Calendar events and tasks that are due, but that’s ok since a defer date is simply when you should start working on a task. Instead, your tasks that deferred to a specific day appear in their own grouping:
You can also identify a specific tag you want to be included in the Forecast View. For example, you could create a tag called “bonus” and apply it to items from your planning perspective if you wanted to have a list of non-urgent next actions you can work off of if you complete your tasks for the day early.
Flexible Inspector
The Inspector contains a lot of the same information from version 2, but it’s now customizable. This allows you to set up the data fields that you see when you select a task exactly to your liking.
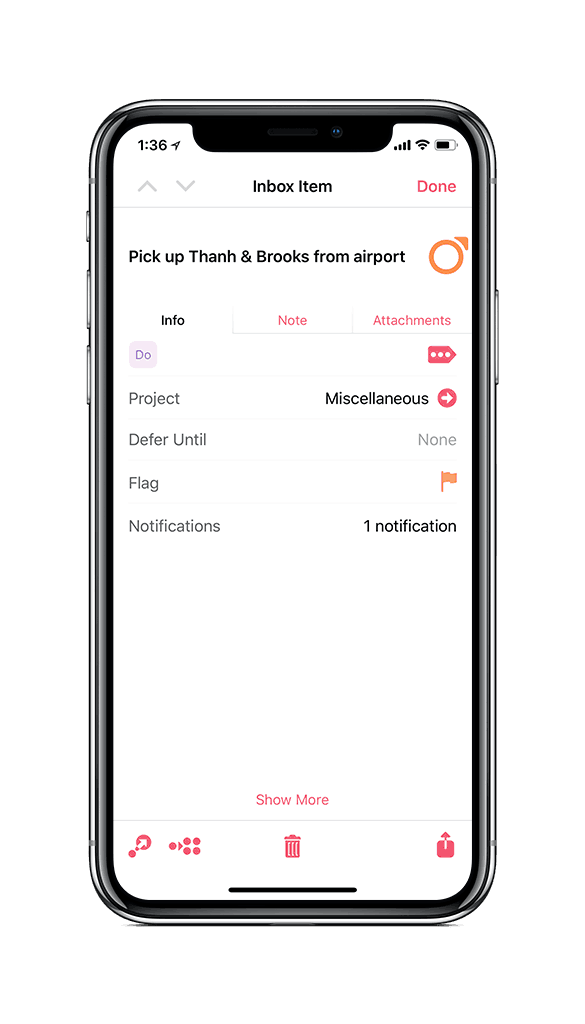
The top part of the inspector will probably look familiar. It displays the task name, the “check circle” (which is colored accordingly to the status of the tag), and three tabs for Info, Note, and Attachment. We’re going to focus on the Info tab since that’s where many of changes are. In addition to using autocomplete here to assign multiple tags, you can also customize which fields are shown in the Info tab by selecting Customize Inspector. This allows you to select which files you want to “Always Show” and which ones to “Hide By Default.”
If you are following the AE Task Management Workflow, here are the fields we recommend you show by default:
- Project Status – this only applies to projects and allows you change them from Active to On Hold, Complete, or Dropped.
- Tags – this allows you to use the handy autocomplete feature to quickly manage the tags associated with a task or project.
- Project – this only applies to tasks and allows you to see which project a task is associated with.
- Flag – this is critical to the AE Task Management Workflow, allowing you to flag the tasks you want to work on.
- Defer Until – this determines when tasks or projects show up in your Planning perspective (when they are available to be worked on). We recommend that you use defer dates (or start dates) and avoid arbitrary due dates whenever possible.
Everything else you don’t really need to worry about. Plus, if you need ate add something that isn’t on the list (like a Due Date) you can alway select “Show More” and enter the information.
The one thing you may want to add to this list (and is shown in the screenshot) is Notifications. OmniFocus 3 gives you a lot more granular control with your notifications. You can set notifications for Due, Before Due, Defer, and even Custom (whatever time period you’d like without modifying any of the other task information). But if you don’t set custom notifications for your tasks very often, there’s really no need to have it visible all the time.
Filtering Rules in Perspectives
Custom perspectives are a lot more flexible in OmniFocus 3 as well, giving you more options for filtering what tasks show up in your perspective. This creates many more options for creating custom perspectives to fit the way you work.
The new Perspective editor is broken down into three sections:
- The Name & Icon
- Filter Rules
- Presentation
Filter Rules determine which items your perspective will include by setting filters with parameters for specific attributes. If an item matches the filter rules for the perspective, it will be shown in the perspective. If an item doesn’t match the rules, it won’t appear.
Filter rules begin with an All of the following operation at the top, which indicates that all of the rules inside it must apply to items for them to be included in the perspective. By default a new custom perspective will also include one Availability: Remaining rule to get you started. This will display all tasks that aren’t deferred to some date in the future and are available to be worked on. (If you don’t want to include this rule in your perspective, swipe left on its row to either Disable or Delete it.)
From here, you can add additional rules that fall into one of 3 categories:
- All of the following – all of the rules in this group must be true in order for tasks to appear in your perspective
- Any of the following – any of the rules in this group must be true in order for tasks to appear in your perspective
- None of the following – none of the rules in this group must be true in order for tasks to appear in your perspective
There’s a crazy number of ways that you can use these rules to create custom perspectives, but let me walk through the updated settings for a work planning perspective.
Keep in mind these perspective settings will need to be customized a little bit to fit your specific situation (i.e. the tags you choose to include will be different). These are the settings we recommend you use and the reasons why we recommend you use each one. This advice is based on the personal experience of the multiple experts we have here at Asian Efficiency and the the thousands of people we’ve worked with over the years.
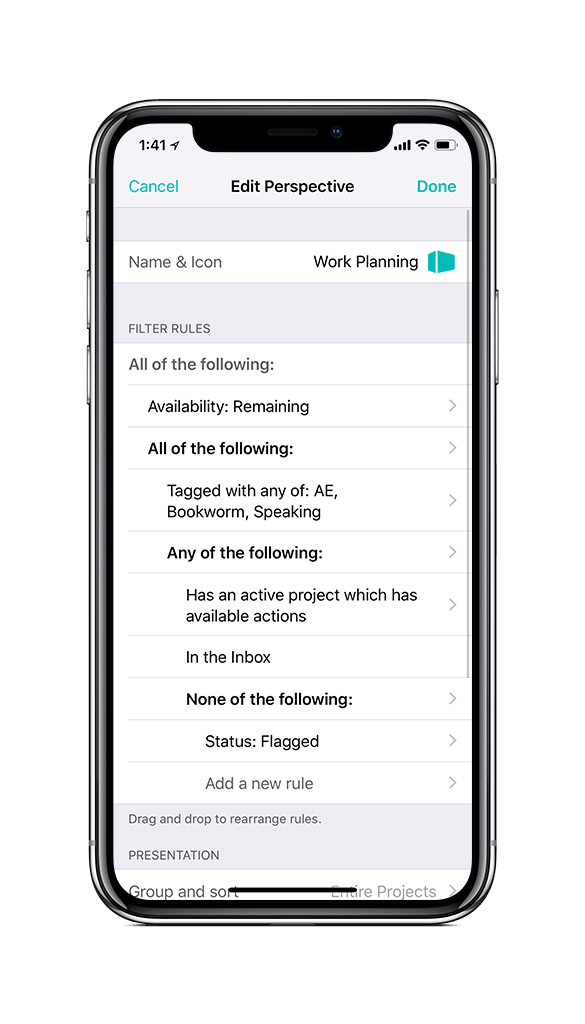
Here’s how we recommend you set up your work planning perspective:
- Availability: Available – this will display all tasks that are available to be worked on.
- All of the following:
- Tagged with any of: (tag1)(tag2)(etc.) – include any work or side project tags you are working on here. This will show all of the things you might want to work on when you are planning your day.
- Any of the following:
- Has an active project which has available actions – this will hide empty projects, projects that are on hold or dropped, and projects that don’t have any active tasks.
- In the inbox – this will show inbox items you haven’t organized yet, but makes sure that if you add something quickly you will see it again before your weekly review as your plan your day off of this perspective.
- None of the following:
- Status: Flagged – this will remove flagged tasks that you’ve already selected to be worked on according to the AE Task Management Workflow (we’ll explain how to use this is just a minute).
The next section in the Perspective editor is the Presentation settings. You can tweak these how you’d like, but here are our recommended settings for the work planning perspective:
- Group and Sort – set to Entire Projects (will sort your tasks by project)
- Group projects by – set this to Ungrouped
- Sort projects by – set this to Projects Order (will keep to the order of projects in your projects tab)
Keep in mind that once you upgrade your OmniFocus 2 perspectives to use these new settings, you will not be able to use them in OmniFocus 2 anymore. You can always “Upgrade” and “Downgrade” your perspectives, but you will have to set them up again from scratch. If you are going to run OmniFocus 3 on iOS and OmniFocus 2 for Mac at the same time and you want to access this perspective on both devices, you’ll want to create two separate perspectives.
How Does This Change the AE Workflow?
These new features really don’t change our recommended workflow too much, but they do make it easier to plan and execute your work.
Here’s how to use the AE workflow with OmniFocus 3:
- Set up the tags you want to use. Make sure to include tags for every work or side project grouping you might want to use.
- Set up the work planning perspective described above. You’ll add the work & side project tags you created in step 1 when setting up the perspective settings.
- Use the planning perspective when planning your day the night before. This will provide you a master list of everything you might want to work on.
- Flag 3-5 items you want to work on. Don’t flag more than this!
- Work off your flagged perspective. If you get those 3-5 tasks done, go back and flag 3-5 more from your work planning perspective.
If you want to dive even deeper on the AE Task Management Workflow, check out this podcast episode where Francesco D’Alessio talks through how to implement in other task managers.
And if you want to see what other super-smart productivity nerds are doing with their OmniFocus 3 setups, check out the Dojo. The Dojo is our online productivity community, and OmniFocus 3 is a big topic in the private forums. There’s tons of great info and ideas there on how to use OmniFocus (and just about any other productivity app you can think of) to make it easier to finish your work and find time for things you love.
Recommended for you
Want the full system? 25X is the flagship productivity system we teach.
Explore 25X →
The planning perspective in the Omnifocus Premium Post relies upon a filter at the folder level to display Work, Personal. The new recommendation is to create a tag called work and another called personal and then filter for those tags? Is it still recommended to use a folder structure? Could the filter above be modified to still search by folder instead of tag or will it not work properly?
If I tap on a project and then hit show more and then hit customize inspector and I update the fields to always show to be the list above does it fix that for all projects and tasks automatically? Or do I have to click on each project and customize the inspector for that project?
I guess is customize inspector a global sorta operation that works anywhere in OF?
Where tags come in handy is when you want to look at things in multiple ways. For example, in a traditional GTD methodology, as you pointed out, you might say @phone Call Thanh. That’s great if you take a 5 minute block, look at your @phone context, and decide to make that call. But what if Thanh calls you, or you run into him in the grocery store? It’s nice to have a tag for people you interact with a lot, showing *all* the things you might need to discuss with them which could have been spread across different contexts (e.g. you might have something @Waiting from them, or something @Agenda that you were going to ask them in the next staff meeting). You could get around this in OF2 by putting the person’s name in a note or in the title of your task and searching globally for their name, but tags are easier.
Likewise, I’ve found tags helpful in the same regard when working with clients. I might have multiple projects for the same client, and tasks that are spread across multiple projects or that are just single actions. If I’m going to visit that client, or if I have a call scheduled with an executive there, it’s nice to be able to see everything I have to do for them at a glance, or to call up everything @Waiting @Client X
Another use for tags is to subdivide and combine contexts. For work I have to do on my computer, I have a context @Mac. However, that could be anything from look at a website, to pay a bill, to write a novel. I have a tag set up for @write, showing me things that I’ve tagged as needing a long block of focused time to do, which I find helpful when I’m planning my week, as it helps me see where I need to leave large blocks in my schedule at a glance. I could have done that as a subcontext in OF2 @Mac – @Write. However, I also travel a lot and do a lot of work on planes, where there is no Internet access. I have another tag of @Plane, indicating work that I can do with no Internet connection. If I’m going on a trip, it would be nice to be able to see all the tasks tagged with both @Write (could do these anywhere I have my computer) and @Plane (this could include tasks besides focused writing, and will only include writing I can do without being online), so if I’m on a plane and have time to write, I can quickly find those tasks.
“As we worked with people to help them get OmniFocus set up, they would present things that were hard to classify into just one of these buckets. For example:
• I need to record a podcast at my computer (tool) with Thanh (person)
• I need to take my brother (person) to the new hipster coffee shop (location)
• I need to record Joel (person) playing a drum track for a new song on my MacBook (tool) at church (location)”
There aren’t examples of the need for tags but, from a GTD perspective, of the need to distinguish outcomes (projects) from next actions. Your examples are projects. So what’s the next action for each?
• phone (tool) Tranh to schedule podcast
• ask Amy (person) the address of the new hipster coffee shop
• book a time for recording on the church (location) calendar
Each action is easily assignable to one context. When you’ve got a moment for phone calls, your Calls list will include Tranh. When you see Amy, your Agendas list will include your question for her. When you’re at church, your Errands list will include the booking.
If you don’t do GTD, maybe you need tags. Or maybe you just need GTD? :)
I found the podcast episode so helpful. Going to check out Dojo now!
Hi Sarah,
We’re glad that you enjoyed this podcast episode. Thanks for checking out the Dojo. :)