Imagine being able to control or automate your computer, the apps and websites you use, and your most common activities right from the push of a button.
And when I say button, I don’t mean a button on the screen or yet another keyboard shortcut you need to remember: I mean an actual physical button on your desk.
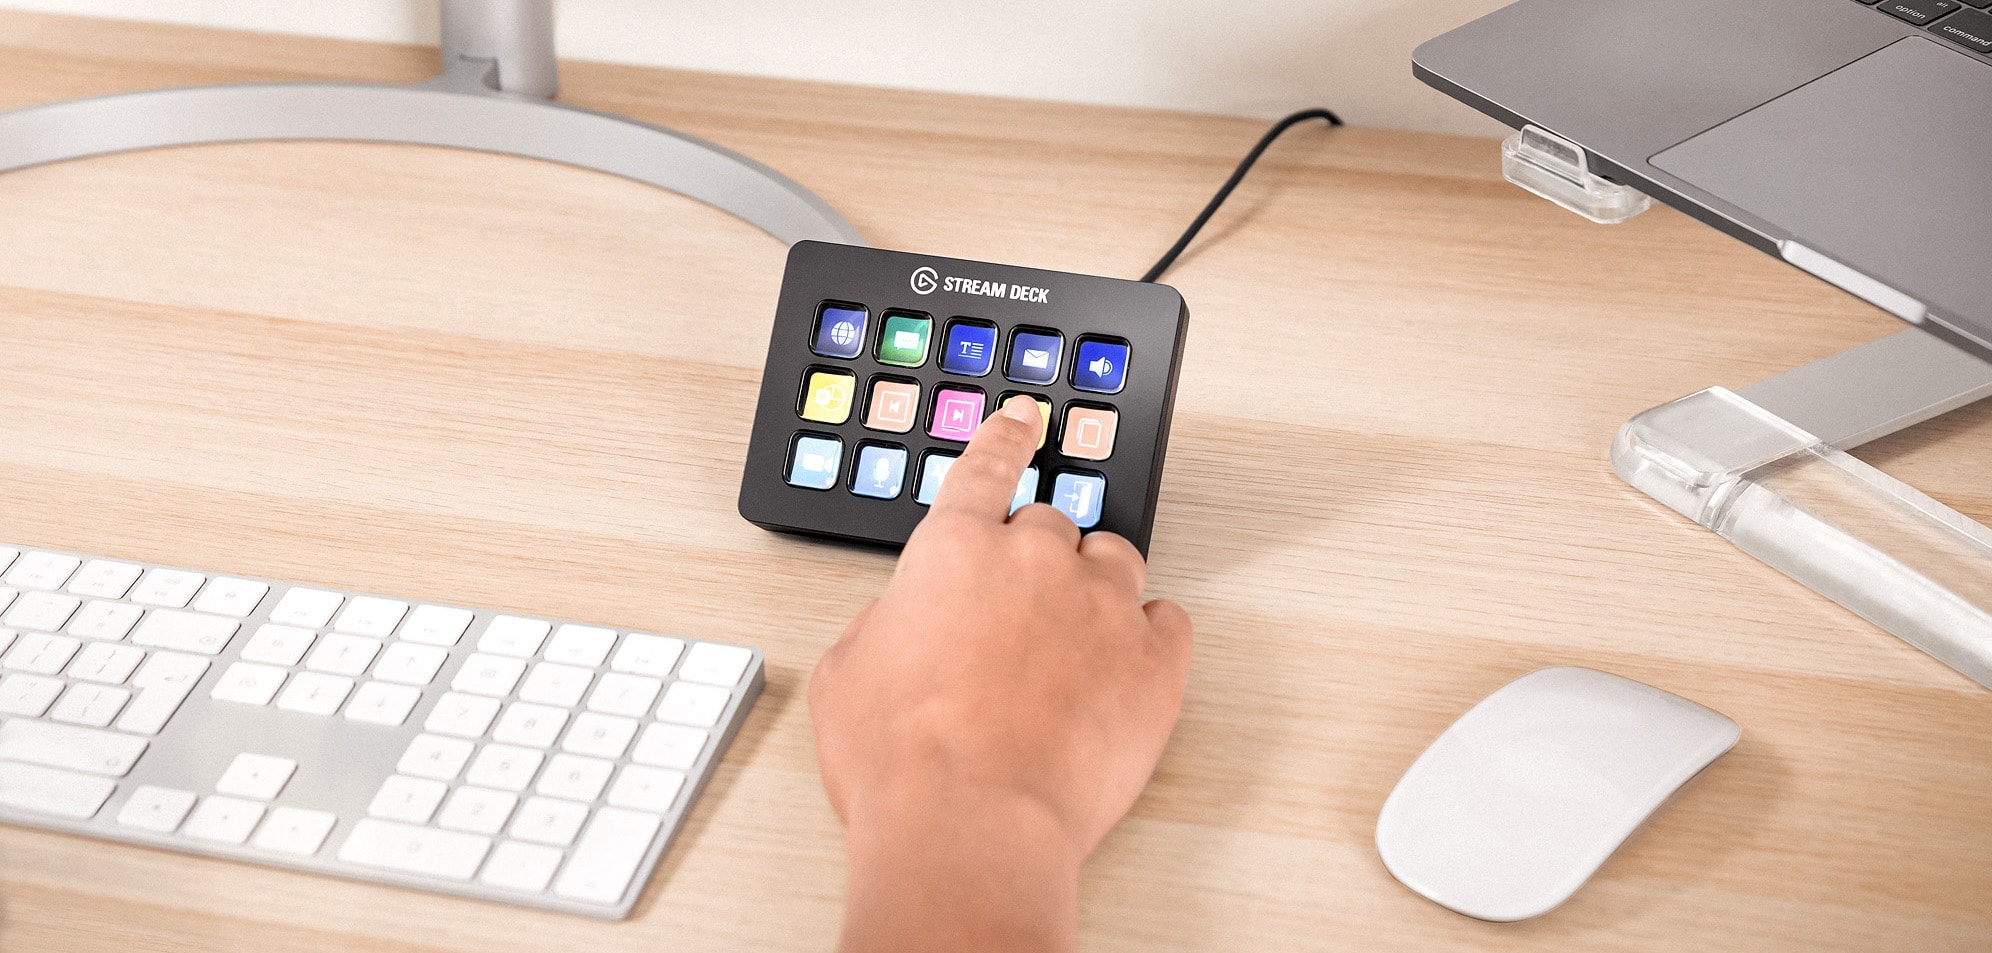
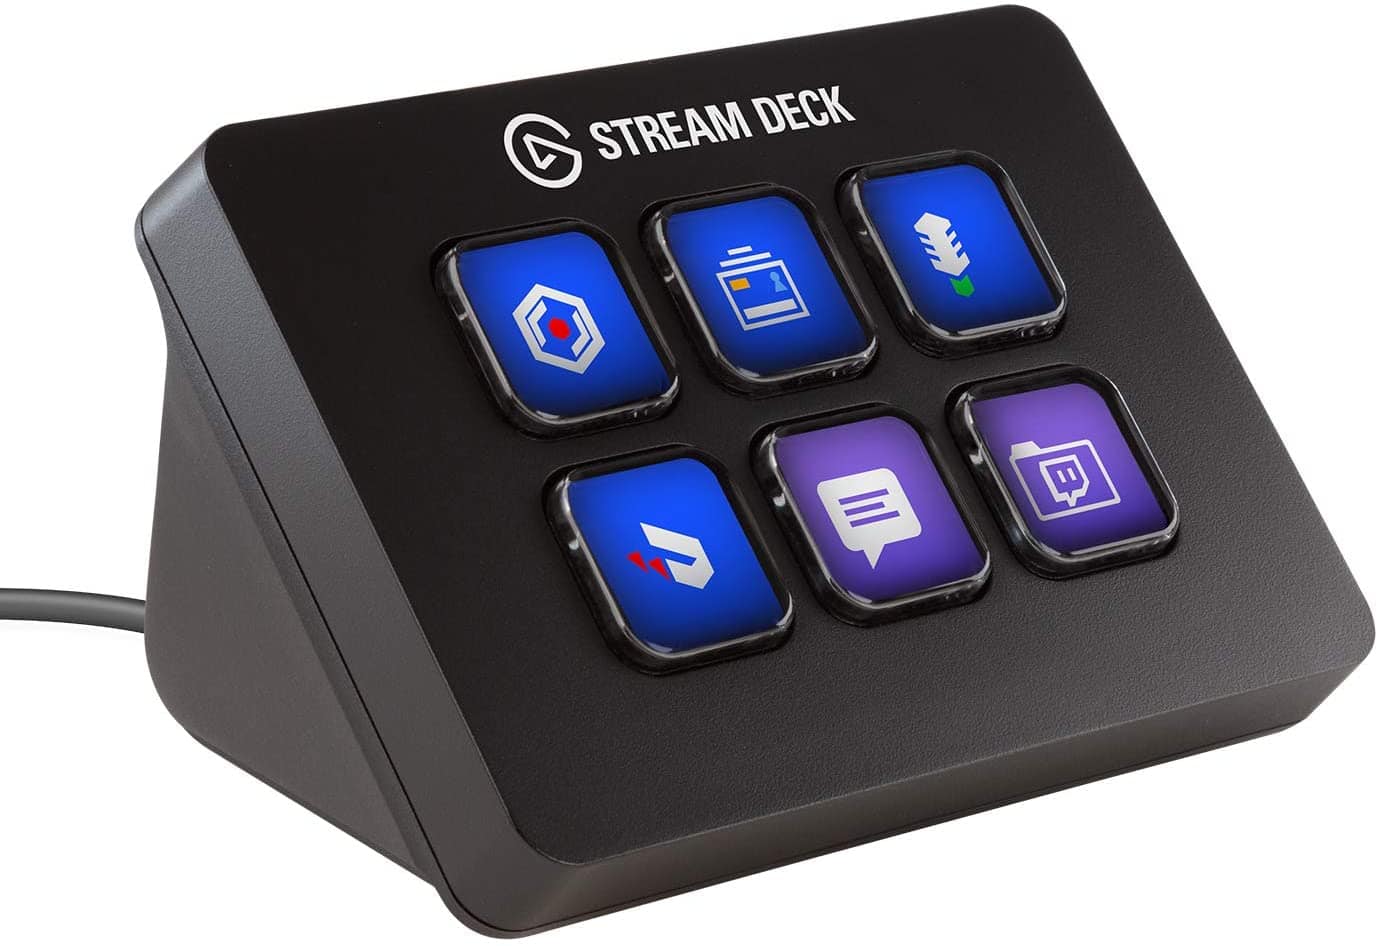
This is possible with the Elgato Stream Deck: a physical device that comes in different sizes and configurations, that plugs into your Windows or Mac computers via USB.
The Stream Deck has a number of customizable buttons you can use to control almost anything on your computer. Each button is a mini-LCD screen, so you can customize it with any image or text you’d like, and you can have folders and multiple “Profiles” to add dozens and dozens of different shortcuts.
I purchased a 15-button Stream Deck just over a year ago to play around with, but I was skeptical: would I really find enough uses for it? Would it be worth taking up (an admittedly small amount of) space on my desk? Or would this be yet another device that would end up in The Box Of Broken Technology Dreams in my closet?
A year in, I can report that the Stream Deck has FAR surpassed my expectations, and is a tool I use throughout the day, every single day. It saves me time and even helps my focus.
In this article, I’m going to take you through the Stream Deck, how it works, what you can use it for, and what I use it for.
What Is A Stream Deck?
As the name implies, the Stream Deck was originally designed for gamers and online streamers. You can see this when you go to the manufacturer’s website, and when you do the initial setup, which we will see below, you’ll see a lot of the pre-loaded actions are for video and game streaming: things like switching cameras, soundboards, sending messages, recording clips, and that sort of thing.
However, there’s a growing subculture that have found that even if you aren’t a gamer or a streamer (I am neither), the Stream Deck makes a great productivity tool.
Using The Stream Deck for Productivity
Here are some examples of the productivity things you can do with a Stream Deck, and remember: all of these happen with a single button press:
- Launch apps, files, and folders
- Control Zoom & MS Teams (camera, mute/unmute, sharing, recording, leaving, etc.)
- Automate Microsoft Office apps
- Open a predefined set of browser tabs
- Initiate keyboard shortcuts in any app (so you don’t need to remember them)
- Start and display a mini-countdown timer or Pomodoro
- Set up windows and apps exactly how you want them for specific purposes (examples: Email processing, writing, digital decluttering, podcast recording, etc.)
- Morning/Evening startup & shutdown routines
These are just a few examples but as you can imagine, the possibilities are endless.
Stream Deck Models
The Stream Deck currently comes in 3 different sizes:
The 15-button model (this is the one I have).
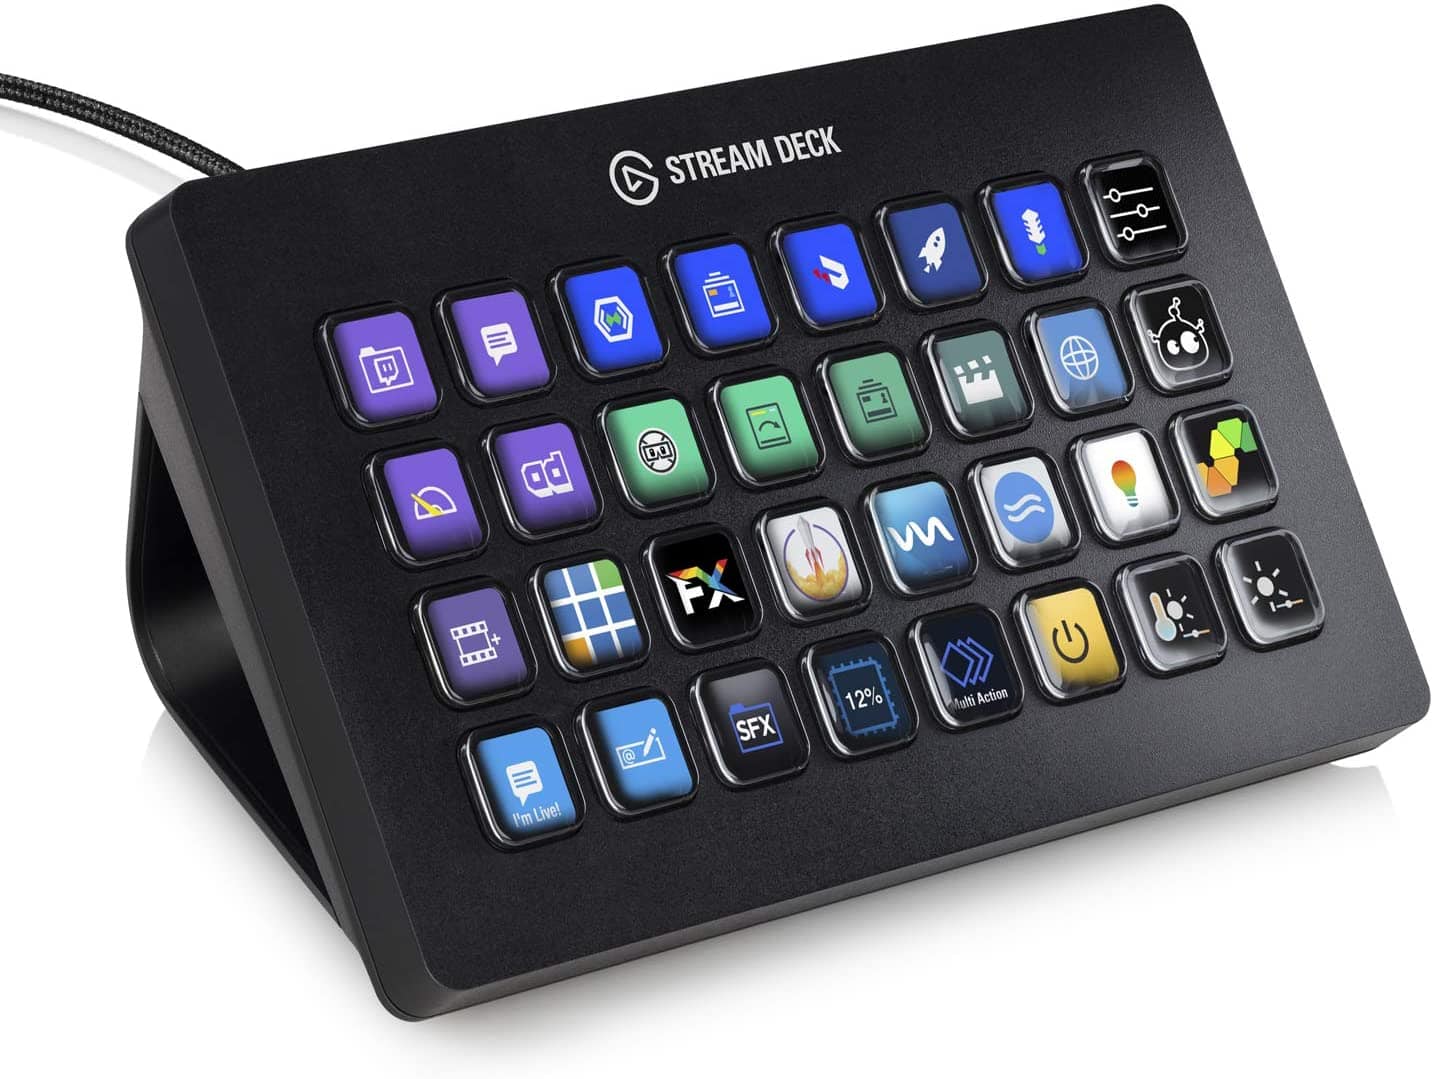
A larger 32-button model that also has a detachable cable
A 6-button model
I am happy with the 15-button model, but if I were to go back in time I would probably purchase the 32. Even though you can expand the 15 button model with folders and Profiles (more on that below), you can have many more 1-press options with the 32.
I would not recommend the 6 button model. It is so limited, and you will quickly wish “I had more buttons”.
There is also a Stream Deck Mobile app for iOS and Android. For a monthly fee, you can use your phone or tablet as a virtual Stream Deck without needing to purchase extra hardware or having it take up space. I won’t be covering the mobile version because for me, the benefit is having those physical buttons there ready to press. The option is there for you if you want it, though!
How The Stream Deck Works
We’ve established that the Stream Deck has customizable buttons, so how do you customize them and start automating your workflow?
To start, you’ll need to download the Stream Deck app for Windows or Mac. Once you install it, you’ll be greeted with a blank Profile with one button.
A Profile is a group of buttons that you can define. It could be buttons that you want collected by a certain work context (“I want my budget report buttons together”), or it could be buttons that you want to display only when a certain app is active (“I want my Outlook buttons to appear when I am in Outlook”).
On the right is a list of predefined actions you can have the Stream Deck perform. To customize a button, you can drag one of the actions on to your desired buttons.
For example, let’s say we want to have a button that opens our Desktop folder. To do that, we will scroll down the list until we find the Open action. This lets you open apps, files, or folders.
We’ll drag it onto a button, give it a name if desired, and select the Desktop folder.
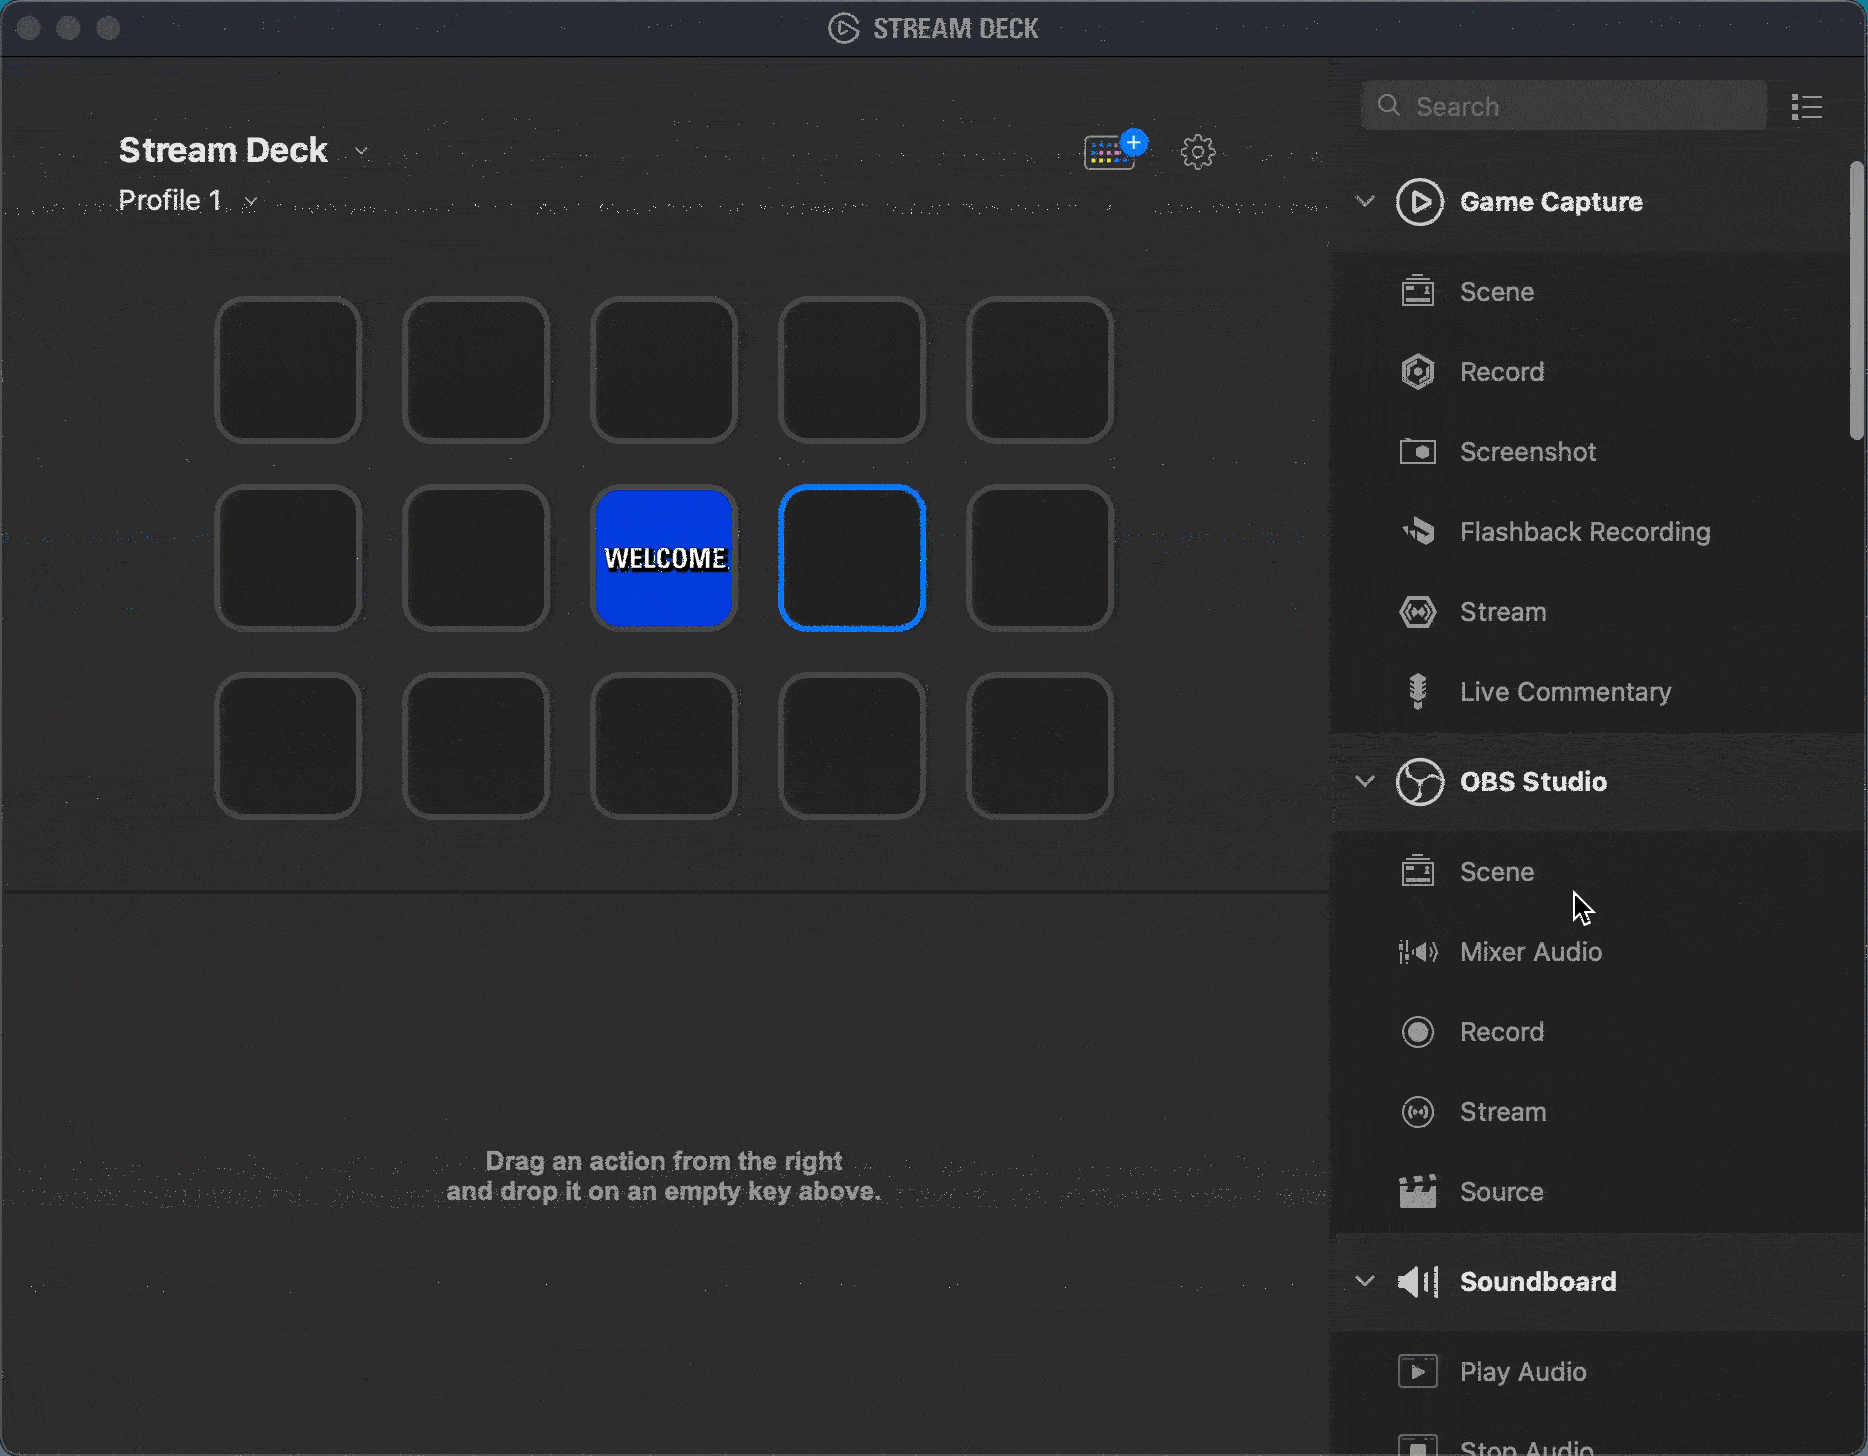
Now when I press the physical button on my Stream Deck, my Desktop folder will appear in Finder or File Explorer.
You can customize the text size, position, or if you want a more minimalist look with no titles on the buttons.
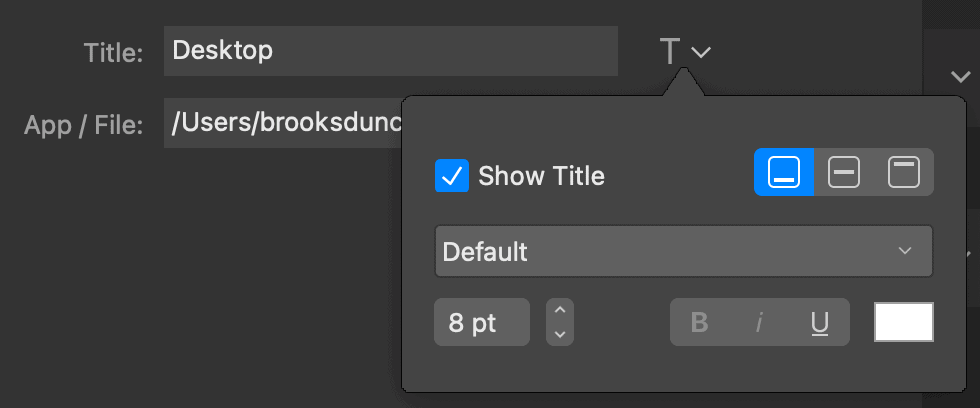
You can also change the icon to one from the Stream Deck’s built-in library, or you can add any image you’d like.
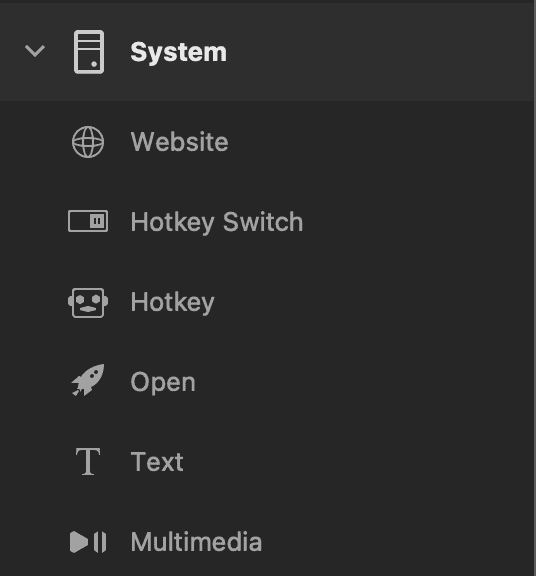
Even if you do nothing else with the Stream Deck, the built-in Website, Hotkey, and Open commands are extremely helpful. They can open any URL, send a keyboard shortcut to an app, and open locations on your computer. You can automate a lot with these 3 commands.
Expand Stream Deck with Plugins
You aren’t limited to the actions that come with the Stream Deck. You can expand your device with plugins, which you can add in 2 ways:
- The Stream Deck Store – The “official” way
- Import a custom plugin that you or someone else creates
The Stream Deck Store
From the app, click the Stream Deck Store icon that looks like a mini rainbow Stream Deck.
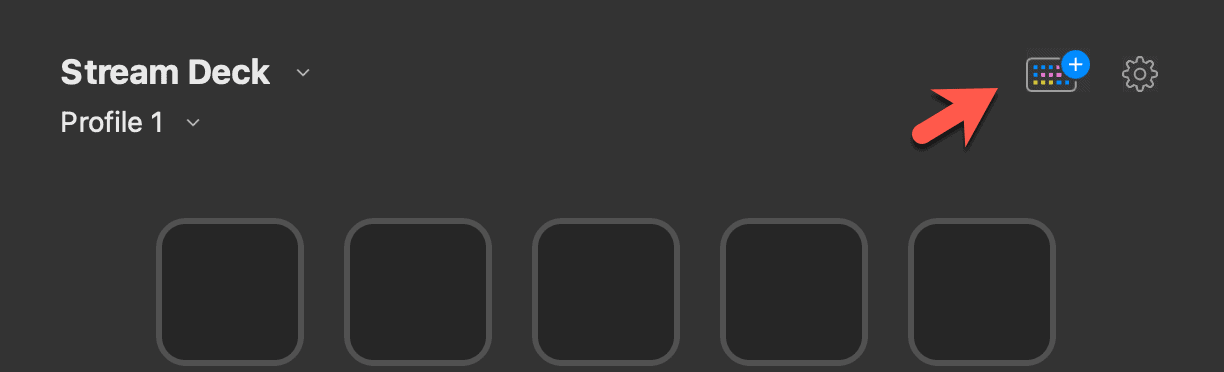
The Store will open and you can add Plugins, Icons, Sound Effects, and more. You can scroll or search for the Plugin you want, and click the Install button.
Custom Plugins
There are many plugins that live outside of the Stream Deck store. For example, I use a Countdown Timer Plugin as my Pomodoro timer.
To install a custom plugin, download it from its website and unzip it if required, You will usually end up with a file that ends with .streamDeckPlugin.
Double-click it and it will install it in the Custom section.
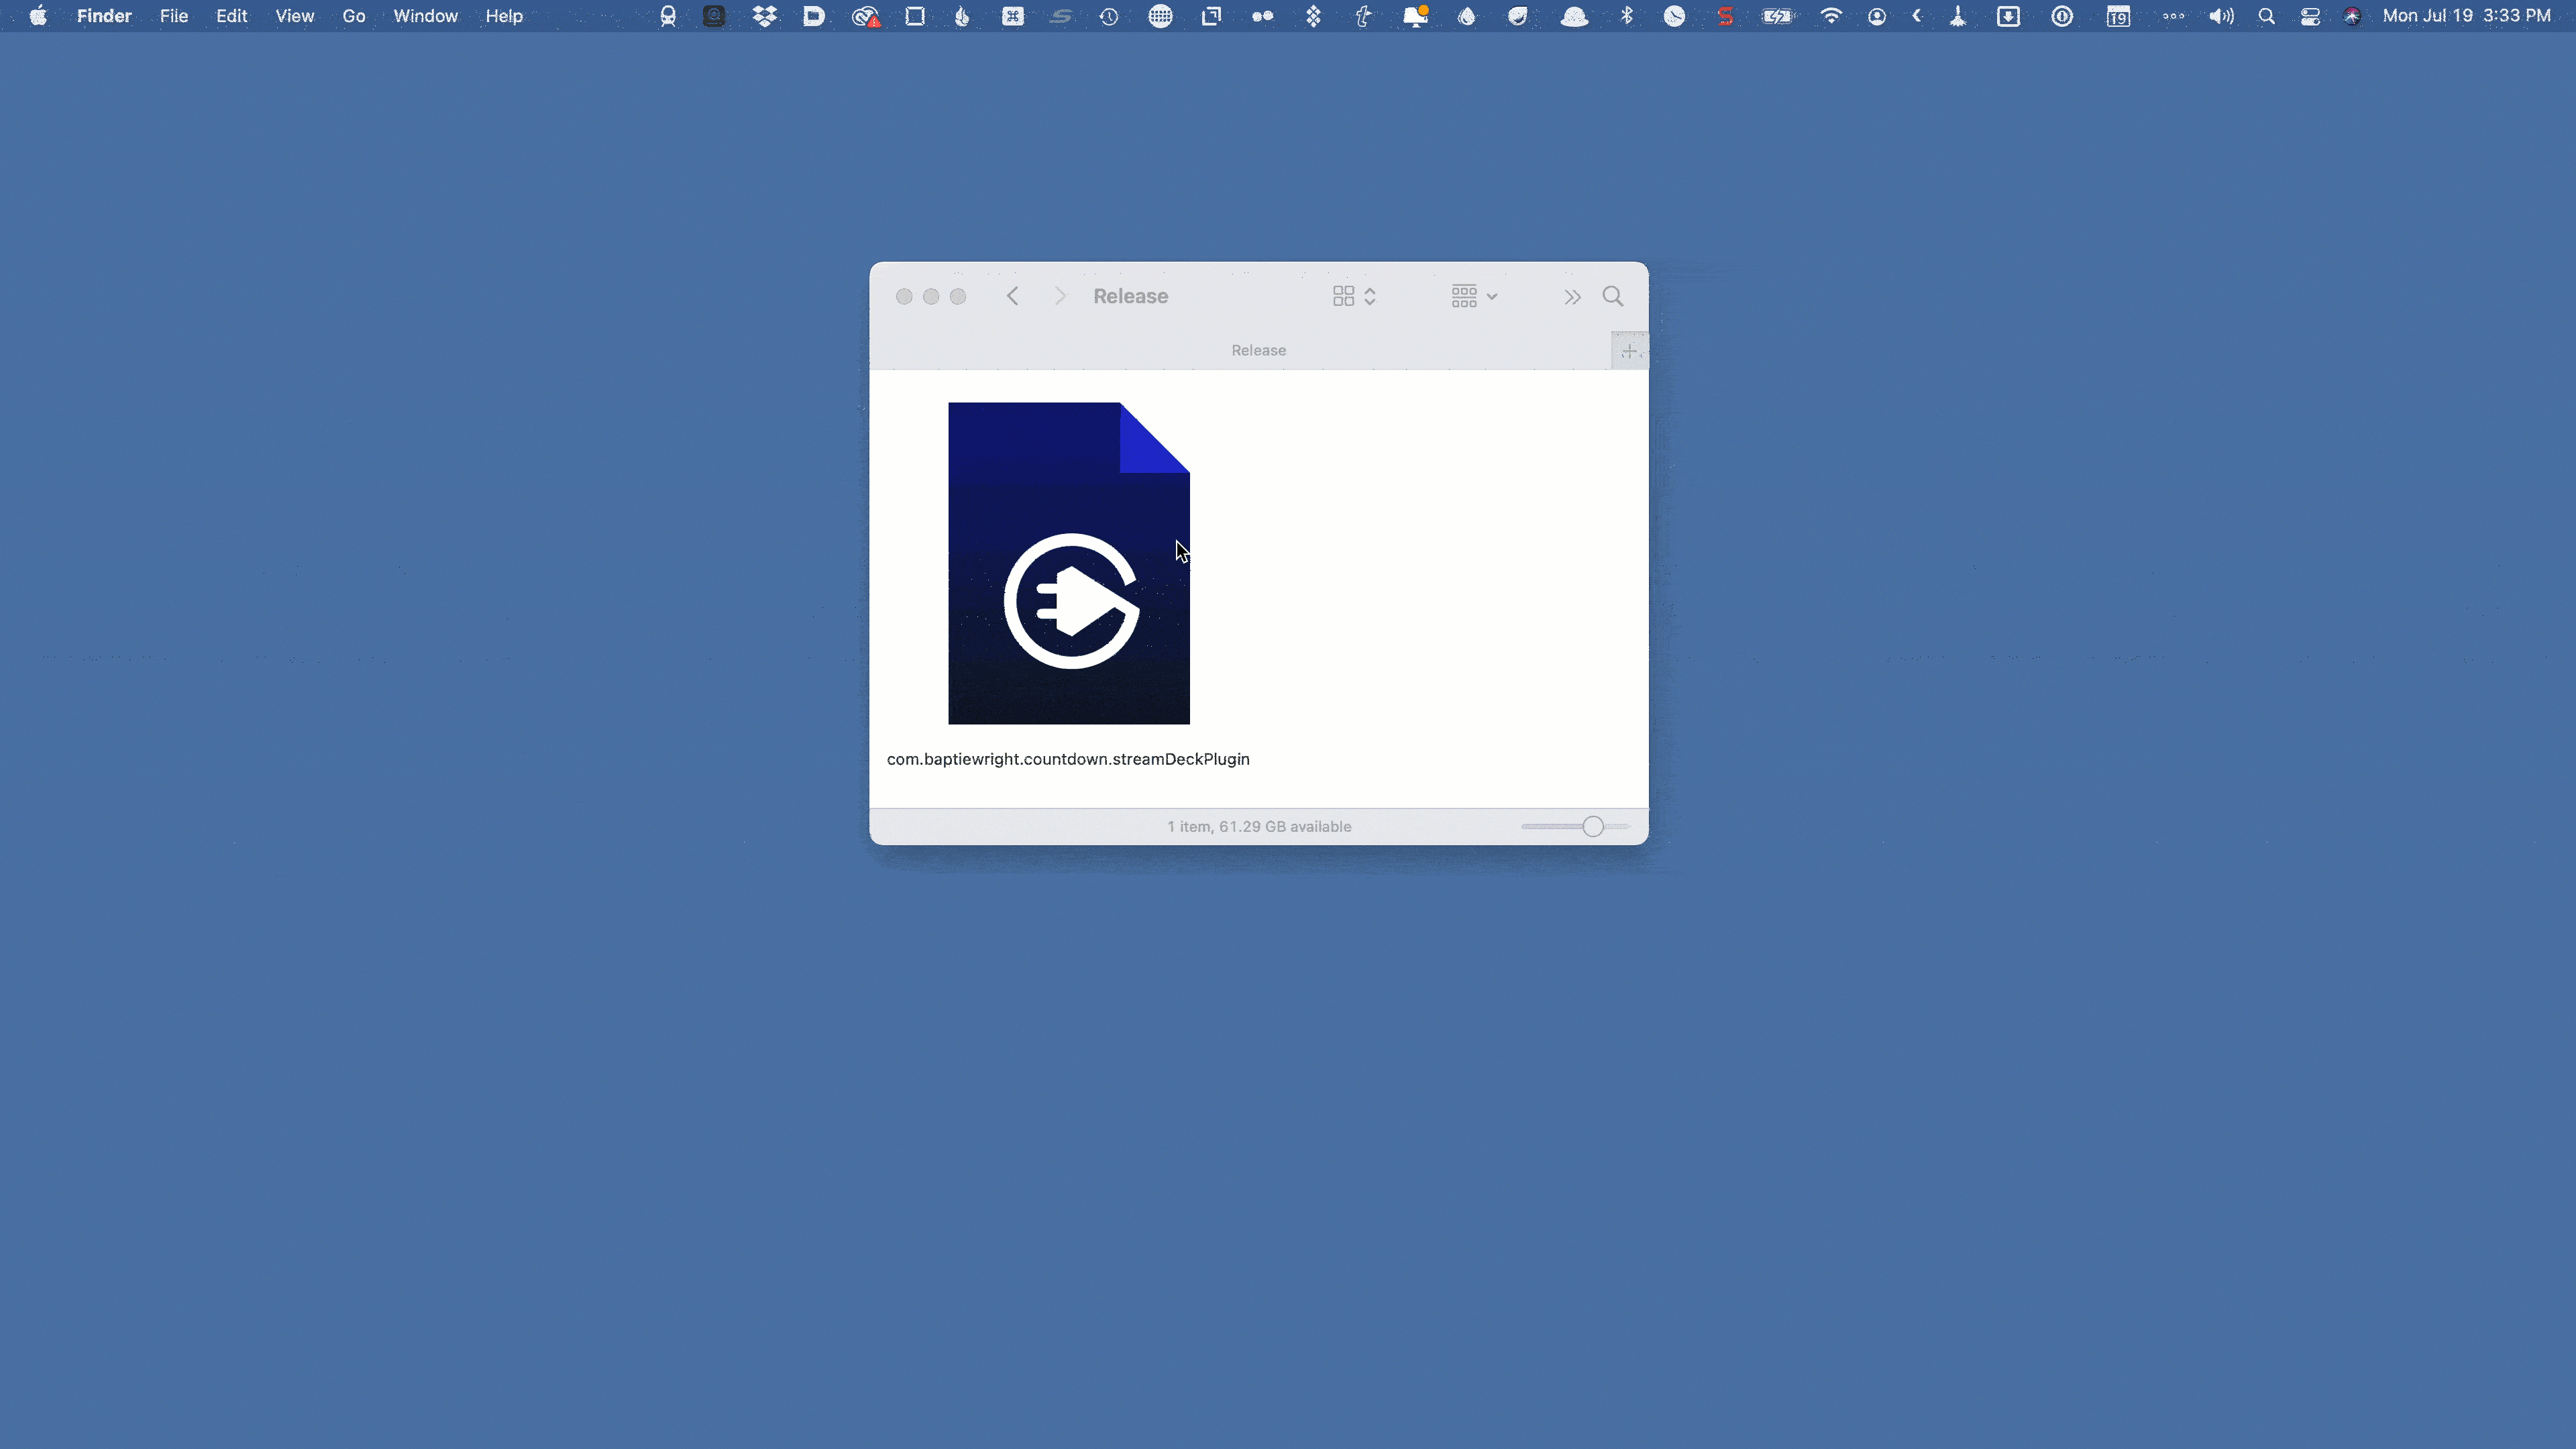
In this example you can see the resulting Countdown Timer plugin.
Just be careful to only download custom plugins from sites you trust.
Profiles and Folders: Have More Actions Than Buttons
If you buy a 6, 15, or 32-button Stream Deck, you aren’t just limited to that number of actions. Thanks to folders and Profiles, you can expand beyond the first “page” of buttons.
Folders
Here is my Stream Deck setup at the time of writing (don’t worry, I’ll cover each button below):
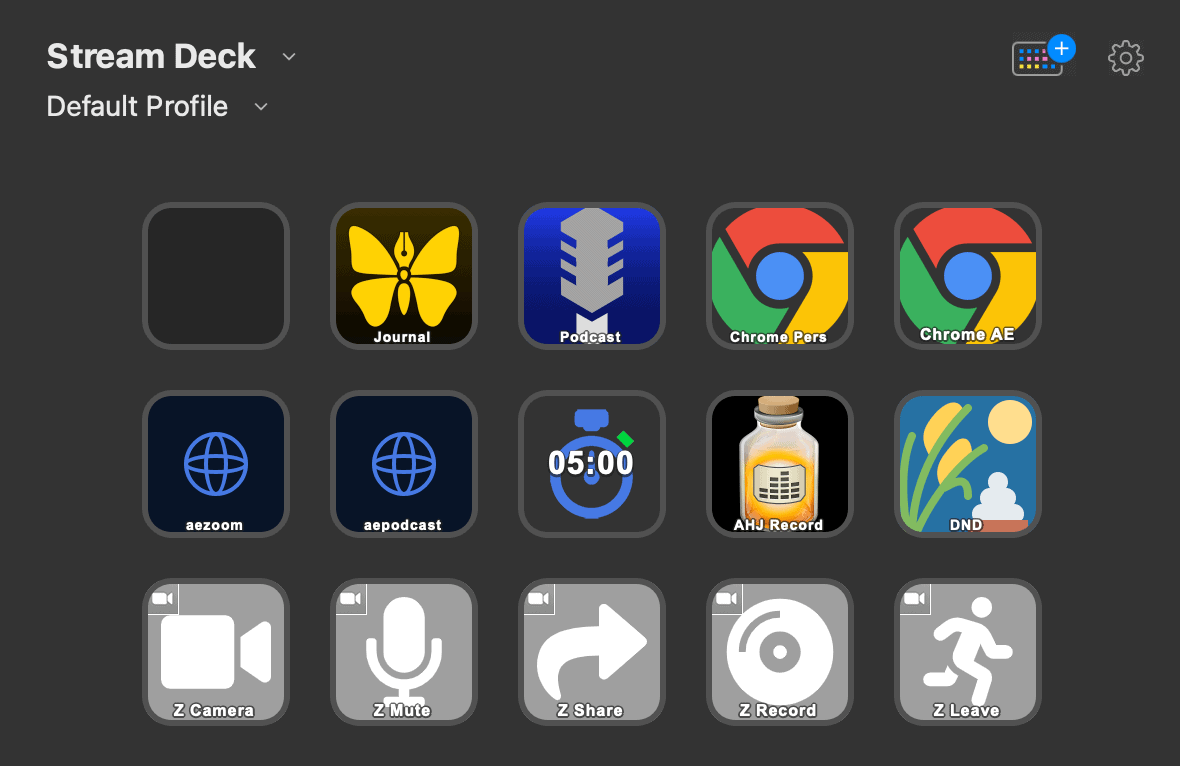
You’ll see that I only have one free button. Does that mean I’m only limited to one more action? Of course not!
To keep it easy, let’s say I have a bunch of keyboard shortcuts that I can never remember. I want to create buttons for them instead.
I’ll go to the Stream Deck section and find the Create Folder action.
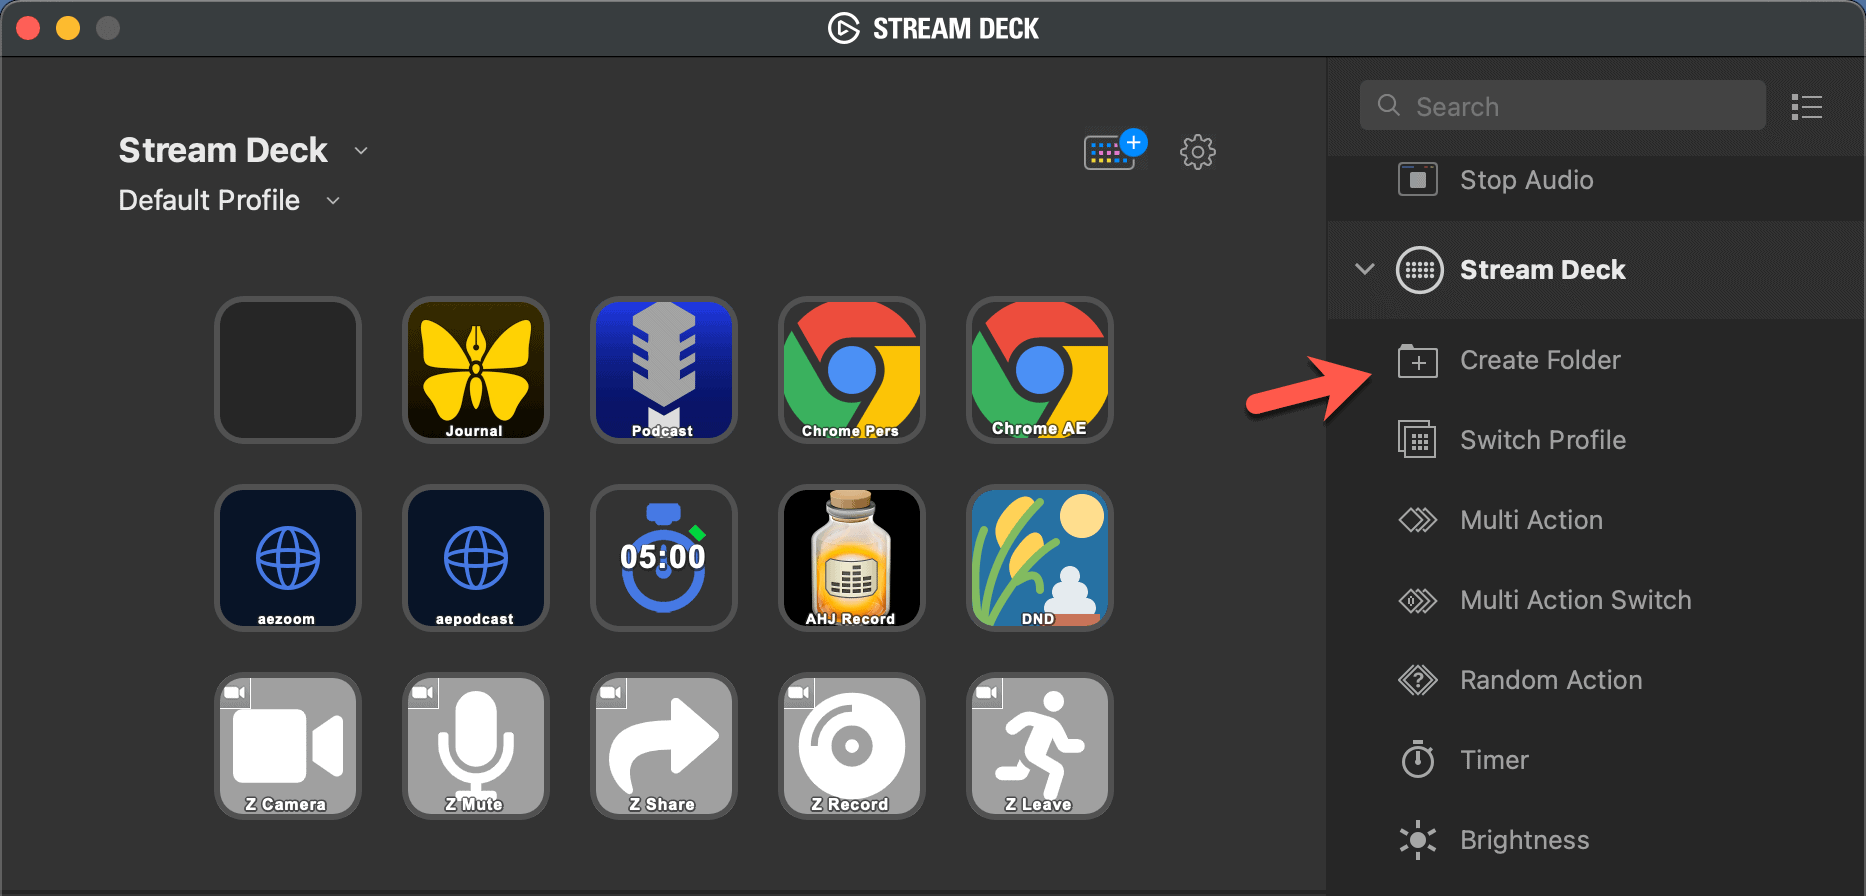
I’ll then drag it to the blank button and give it a name – KB Shortcuts.
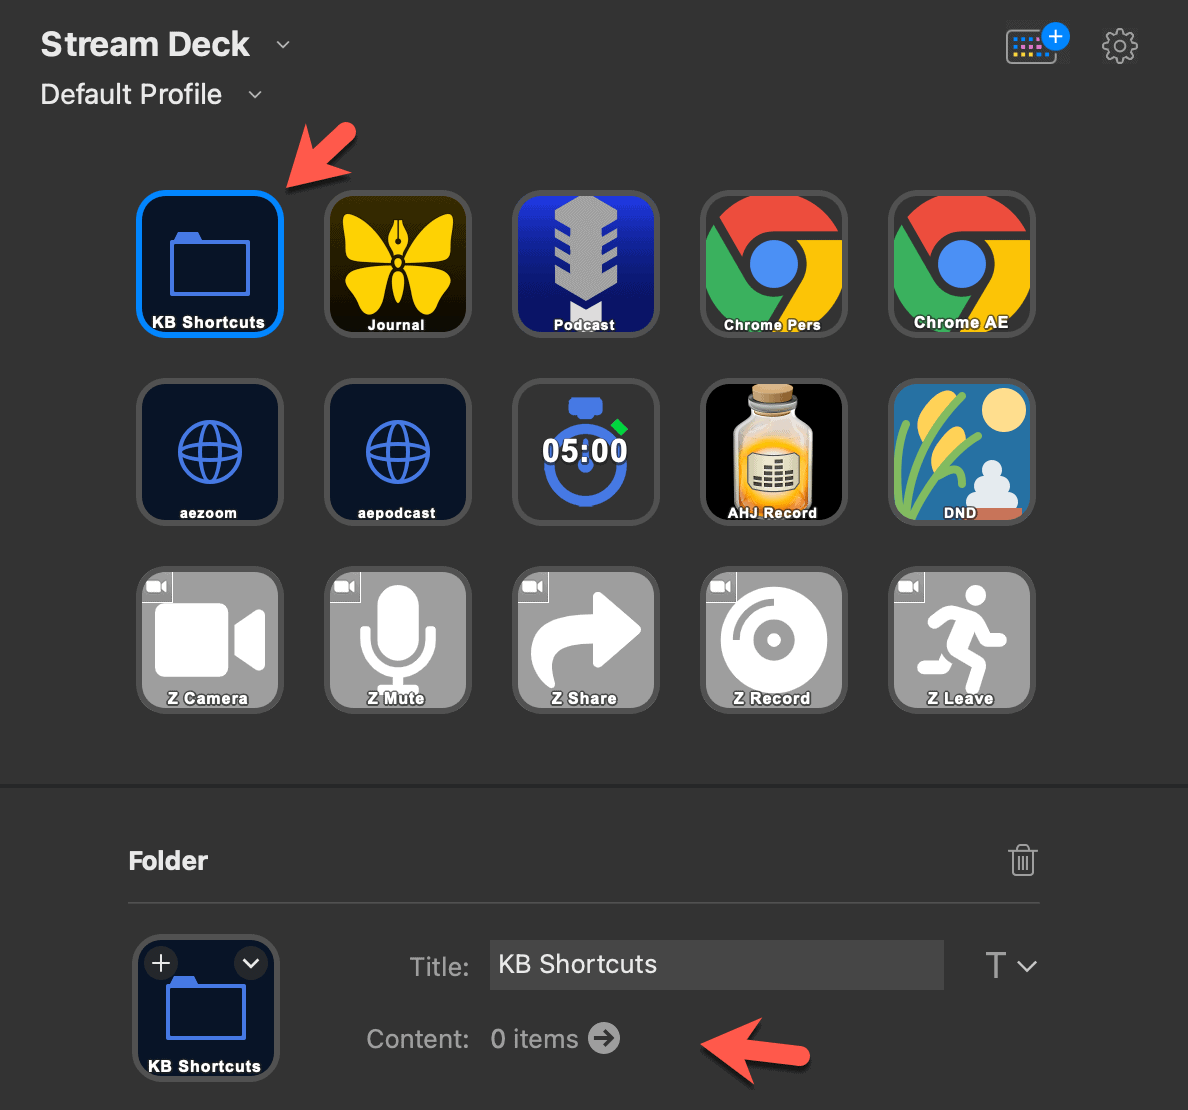
You’ll see as of now it has 0 items.
Next I’ll go into the folder, either by hitting the button on my Stream Deck or double-clicking it in the app.
The buttons are all blank, except for the Return button in the top-left. Now I have 14 (in my case) more buttons I can fill up!
I’ve now added a few keyboard shortcuts using the Hotkey action. It will take 2 button presses (one to open the folder, one to execute the command), but that is still faster than digging around menus.
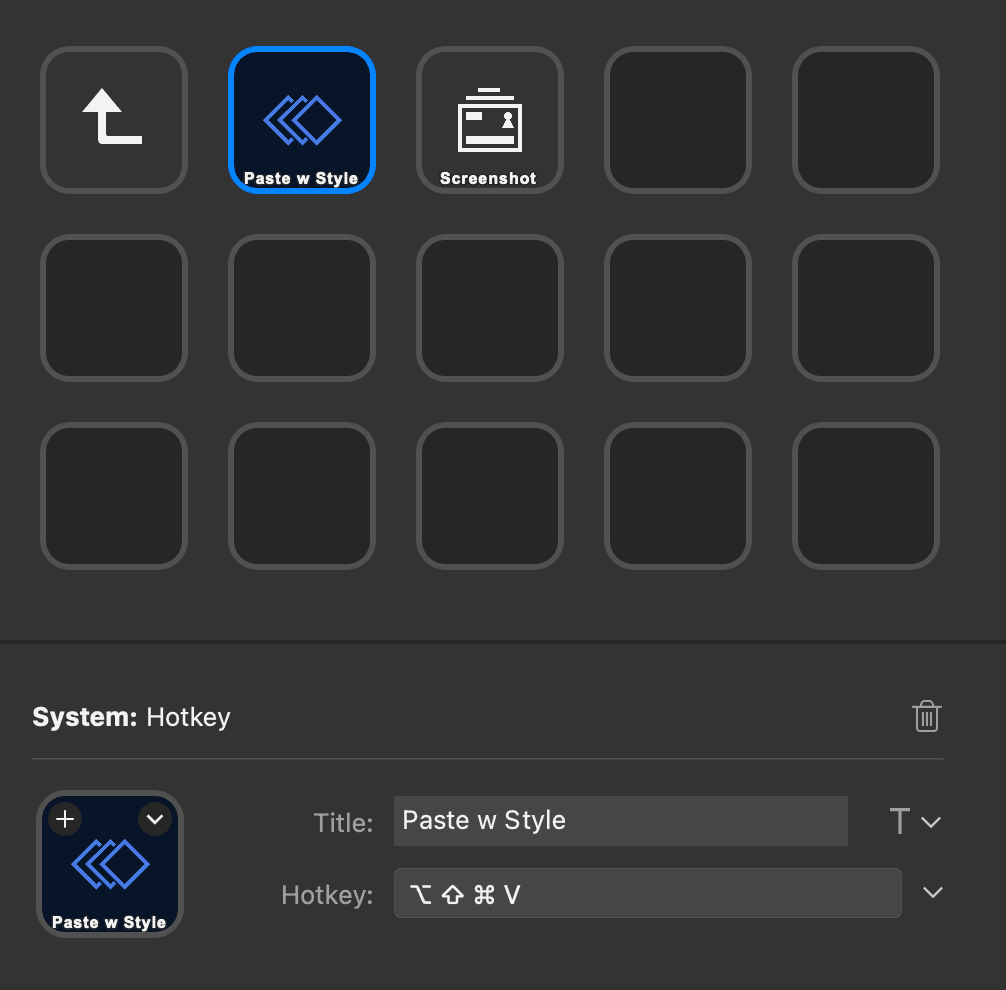
To go back to the main screen, just hit that Return button in the top left.
Profiles
Folders are great, but what if you want to have collections of buttons in a theme:
- By Context – buttons you want together when performing certain actions like workflows, rituals, etc.
- By App – buttons you want to show when using a certain app, either manually or even automatically.
You do this with a Profile.
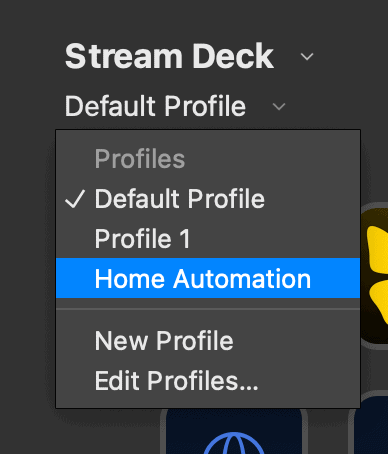
For example, let’s say I wanted to create a profile for Home Automation to control some Philips Hue devices.
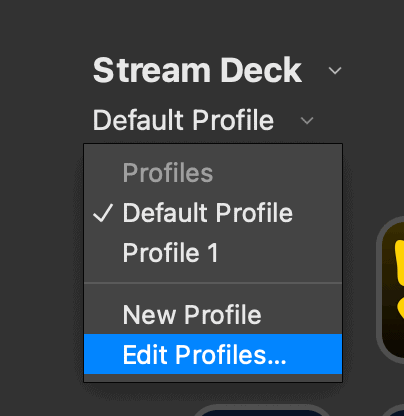
The easiest way is to click on the name of the current Profile (yours is probably Default Profile and then choose New Profile or Edit Profiles… (in this example we will choose Edit, if you do, then hit the + button at the bottom left of the screen.)
Double-click on the Profile name it give it a name. In our case we’ll call it Home Automation.
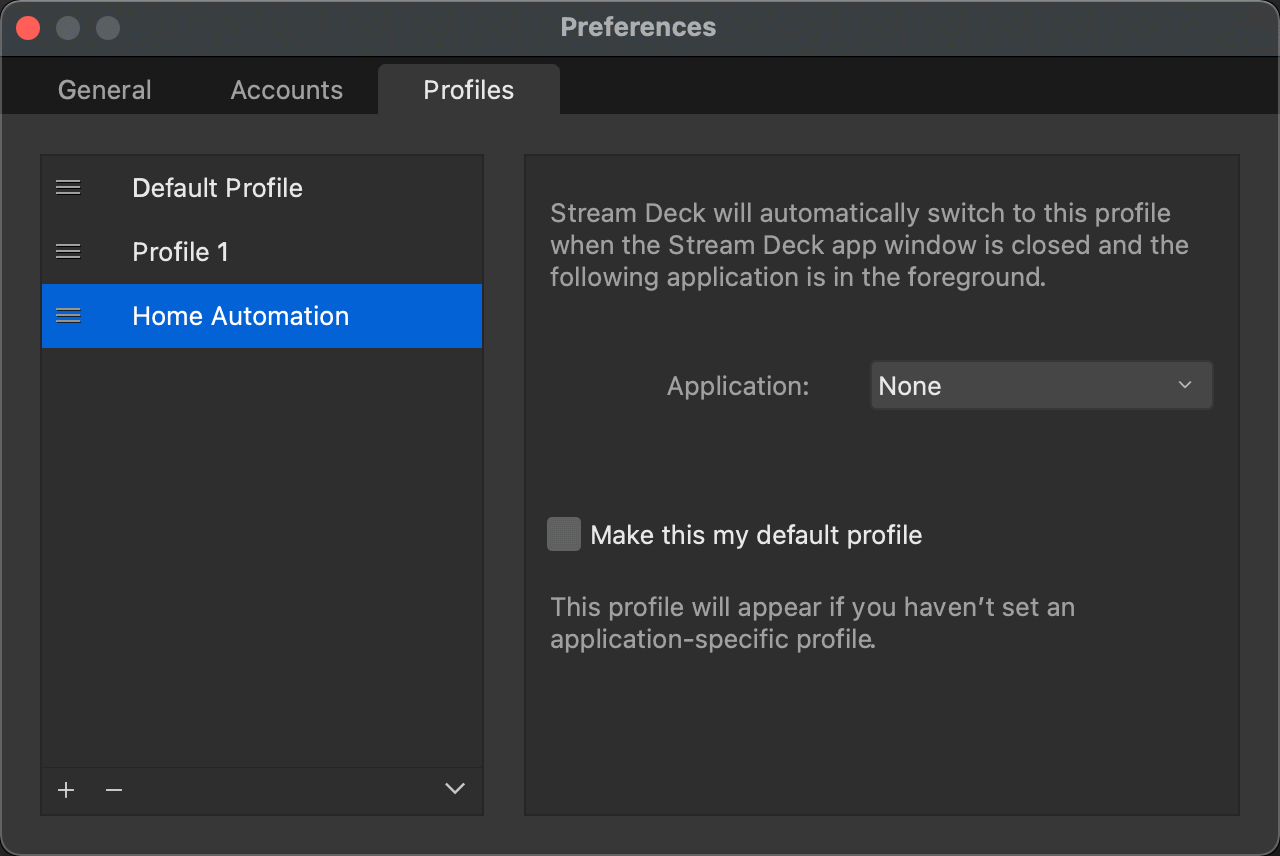
You’ll see that you can make your new Profile your default Profile, and you can set an Application. If you choose an Application, your Stream Deck will automatically switch to this profile whenever your selected Application (say Outlook or Zoom) has focus.
I personally don’t like to do this: I like being in control of what my Stream Deck is doing when, but the option is there if you want it.
Once you’ve set your Profile, close the Preferences window.
Now when you click on the Profile name in the top left, your new Profile will appear. I’ll select Home Automation.
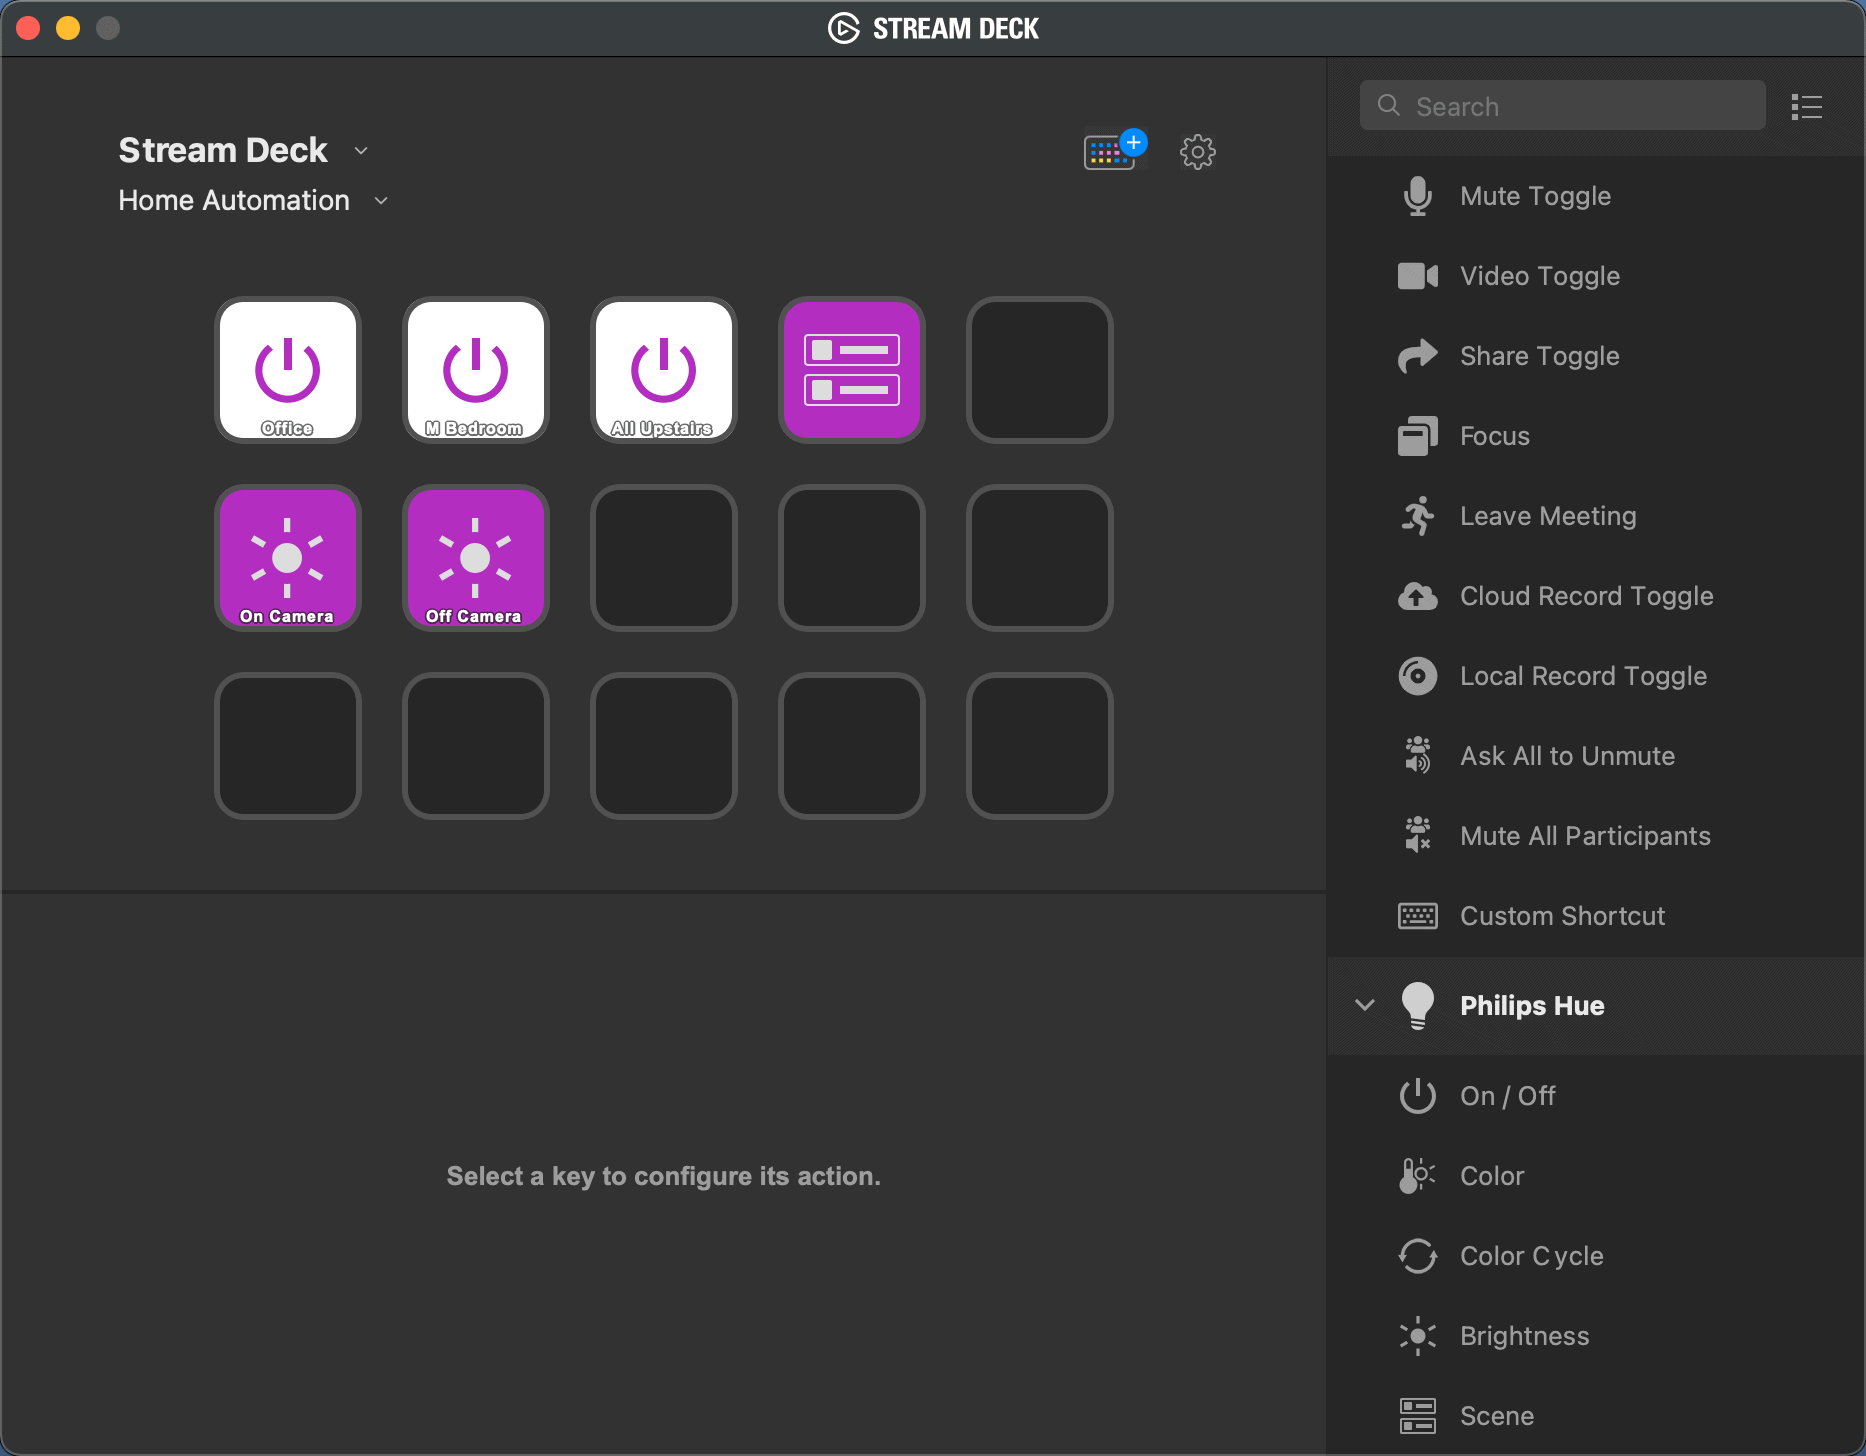
Now you’ll be presented with a blank Profile just like when you started. You can remove that Welcome button.
In my case, I have added the Philips Hue plugin from the Store, and will add actions to control my Hue lights.
Linking A Button to a Profile
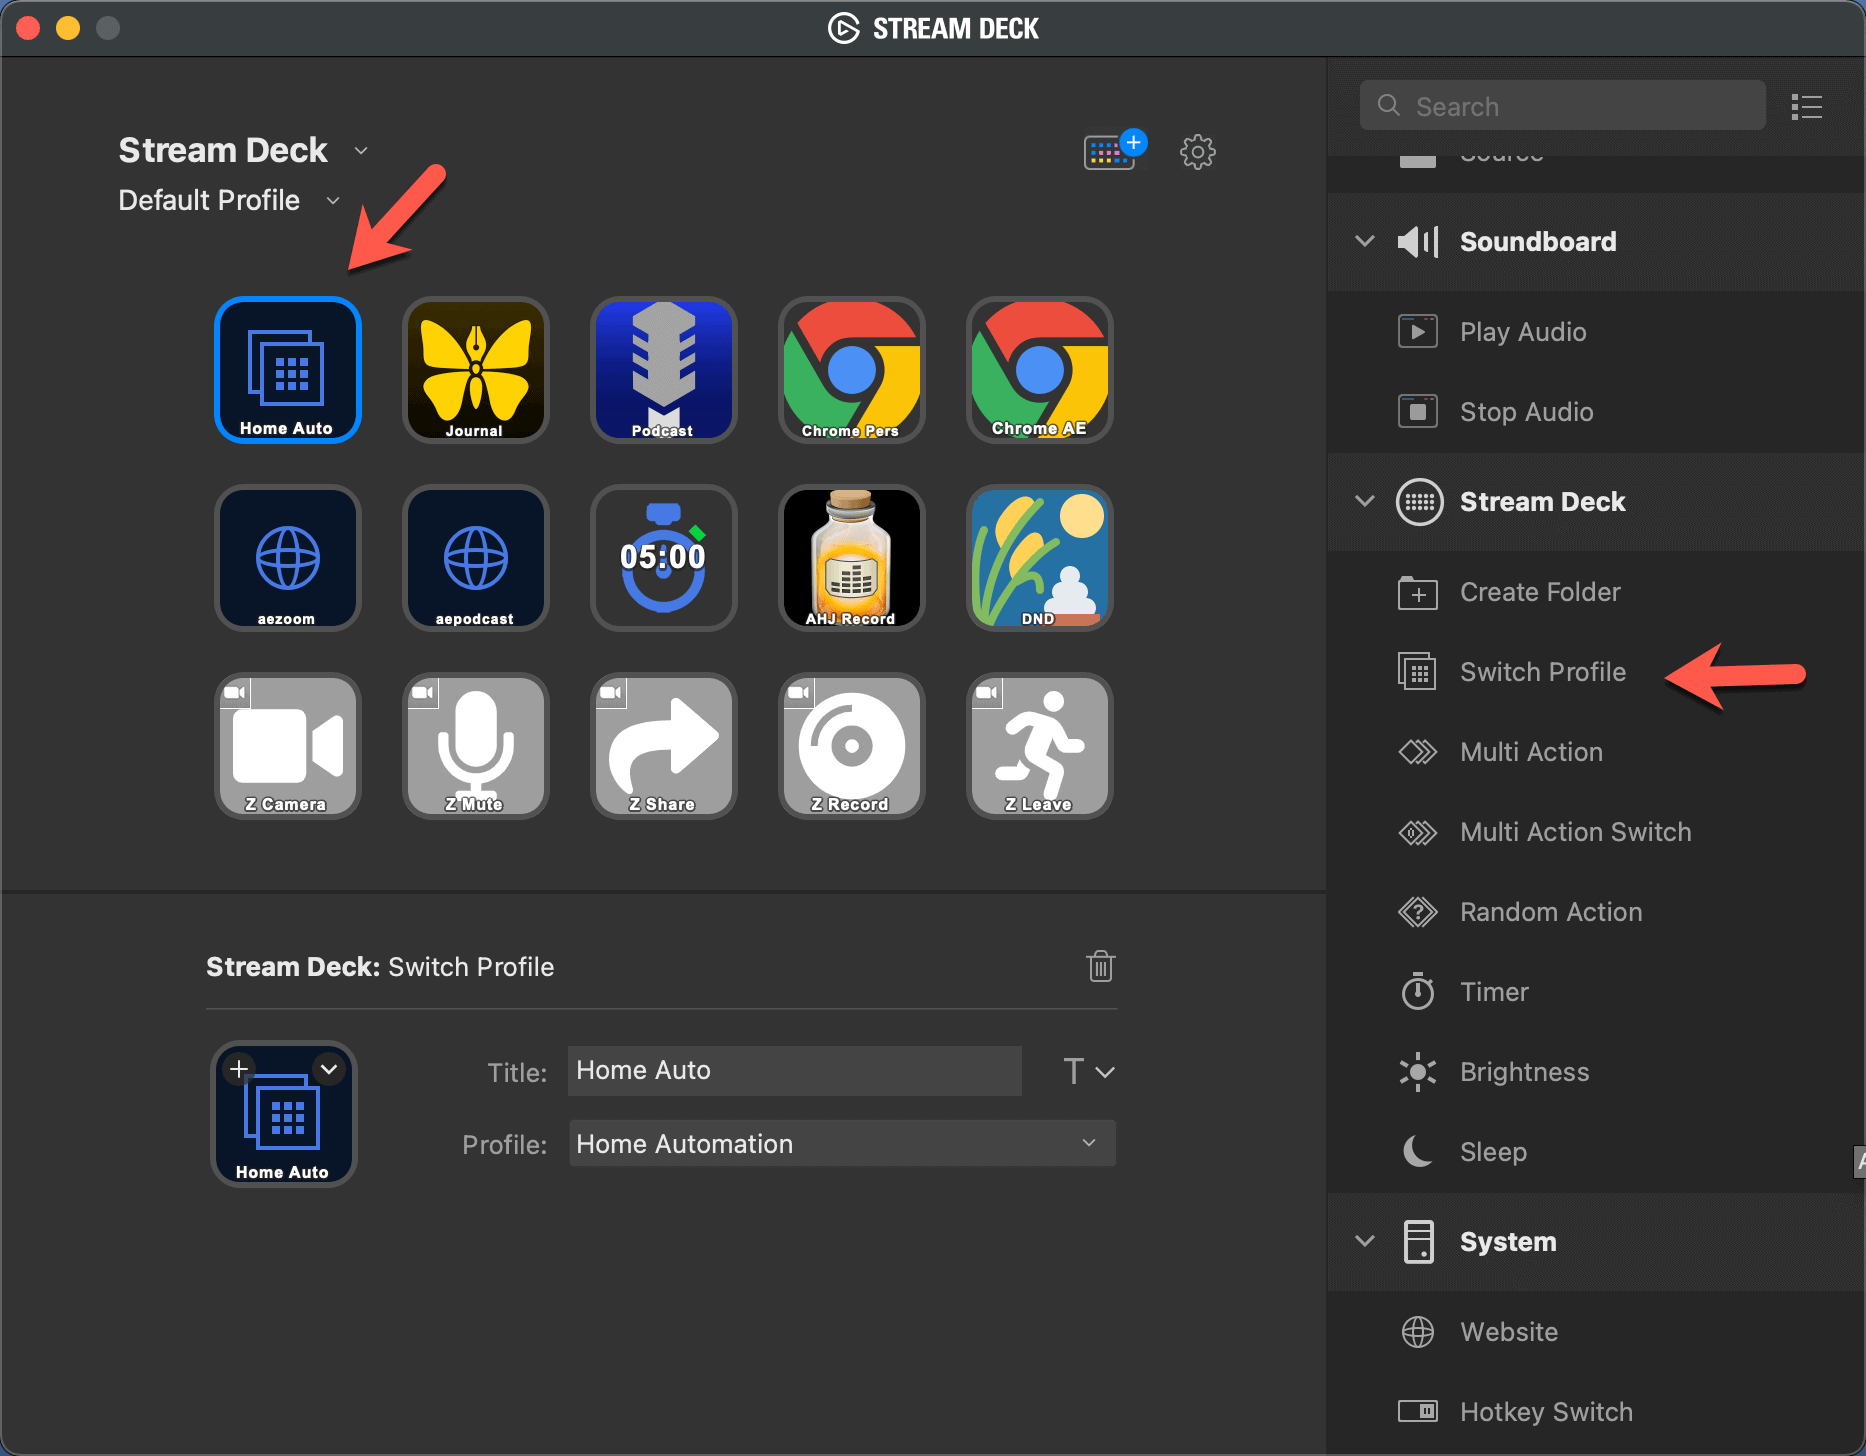
You can switch Profiles by clicking on the profile in the App or your menu bar as we have seen, but you can also do it using a button on the device.
This is where the 32-button Stream Deck shines – you can have a row or column of buttons that switches between Profiles. This makes it fast, easy, and efficient to context-switch.
To assign a button, use the Switch Profile action under the Stream Deck section. Select the Profile you want to switch to, which in our case is Home Automation.
Stream Deck Automation on Windows and Mac
You’ve seen by now that you can do a lot on your computer using the built-in action and with Plugins.
Believe it or not, we have barely scratched the surface of what you can do. The reason? You can use some automation tools on Windows and Mac to automate almost anything.
Then, you can have your Stream Deck trigger those automations by pressing a button.
The automation tools are:
- Windows: AutoHotkey
- Mac: Keyboard Maestro
Windows Automation
Autohotkey is a scripting program, which unfortunately makes it a bit complex for less technical users.
To use AutoHotkey with Stream Deck, the usual workflow is:
- Create script to accomplish your desired automation
- Assign the script a hotkey (here is documentation)
- Use the Hotkey action in Stream Deck to trigger that new hotkey from a button on the device
Here is an example of using Autohotkey and Stream Deck to control Powerpoint.
If you don’t want to mess around with scripting, here are some awesome templates to control Teams, Outlook, Excel, and more.
Mac Automation
On the Mac, Keyboard Maestro is a visual tool that can control almost anything on your computer.
We have a popular (albeit slightly dated) Keyboard Maestro tutorial to get started.
You have a number of options for triggering Keyboard Maestro automations from the Stream Deck:
Hotkey
Like Autohotkey on Windows, assign a hotkey in Keyboard Maestro, and then using the Hotkey action in the Stream Deck app, trigger that same hotkey.
Official Keyboard Maestro Plugin
There is an “official” Keyboard Maestro plugin installable from the Stream Deck Store. All my older automations use this method.
While it is good that you can install it from the store, it is quite “fiddly”. You create the button using the Keyboard Maestro action, which gives you the row/column ID.
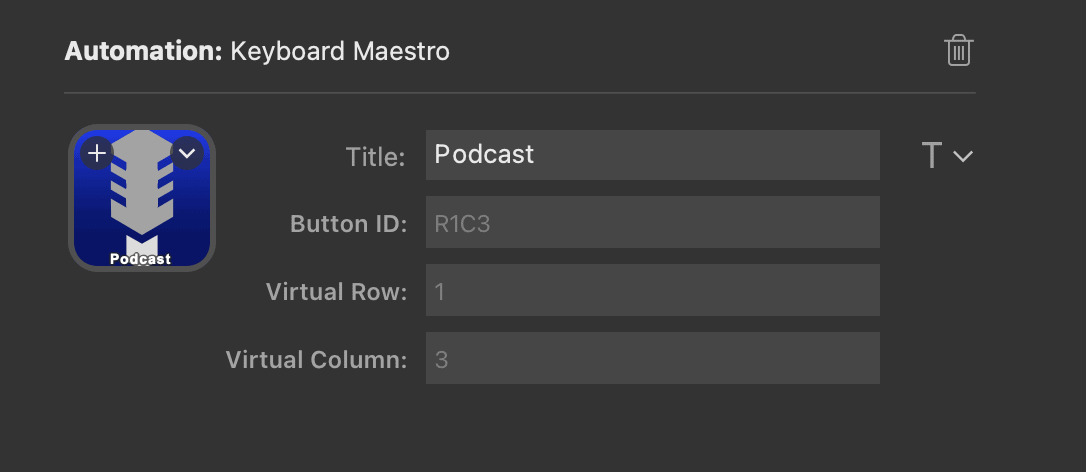
You then create the Keyboard Maestro automation and choose this device key: and press the Stream Deck button.
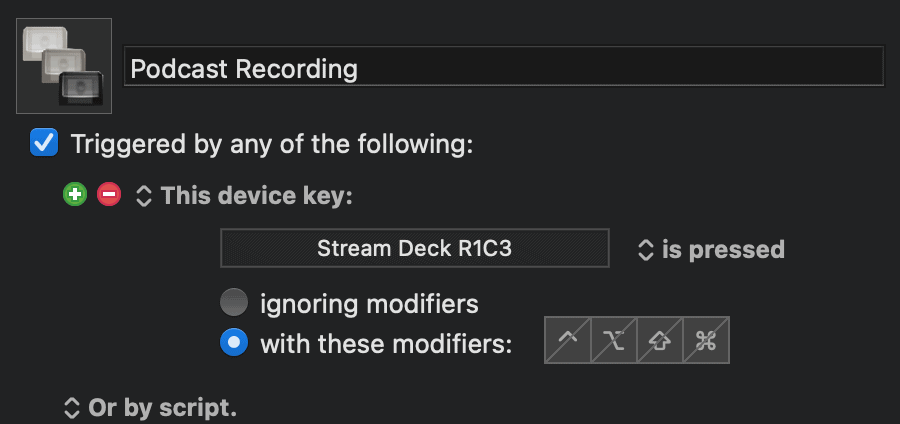
It works fine, but what happens if you decide to move the button or rearrange your Profiles? Your automation breaks.
Much better is this Custom Keyboard Maestro plugin called KMLink.
Download, install it, and then when you want to add a Keyboard Maestro automation to your Stream Deck, use the KM Link action.
Then it is as simple as choosing the Macro you want to execute. So easy.
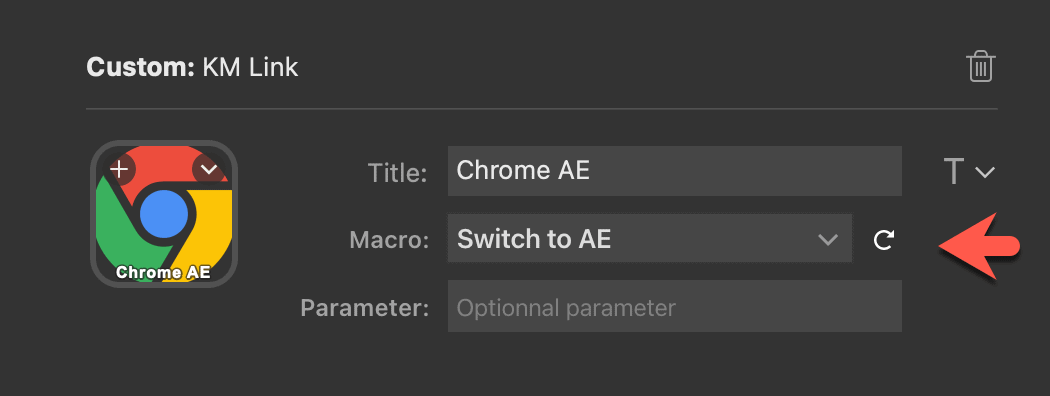
I haven’t gotten around to switching up my old buttons, but all my new Stream Deck/Keyboard Maestro automations use KMLink.
How I Use The Stream Deck
When I started using the Stream Deck, I followed our usual productivity advice: I started small.
Instead of trying to fill all buttons up right away, I started with one or two. Then I added button by button as more use cases came up. This is how I recommend you get started too.
My favorite things to use the Stream Deck for are:
- Setups: Press one button, and have my computer magically start and move apps, folders, and windows just as I like them.
- Zoom controls: I participate in a lot of online meetings (who doesn’t?), and I also record The Productivity Show and other recordings for The Dojo, our online productivity community. So I am on Zoom and on camera a lot. I like having physical buttons to press so I can keep my focus on what is happening, and avoid the dreaded “Brooks, you’re on Mute…”
- Other miscellaneous activities that I do multiple times a day.
It’s not like I can’t do any of this without a Stream Deck, but having one-button access just makes things so much faster and easier.
At AE we like to say that small changes lead to big results. In fact, as I type this, I am wearing a t-shirt that says One Tweak A Week. We truly believe this, and anything you can do to improve your Time, Energy, and Attention even a little bit will pay off over time. The Stream Deck does that for me.
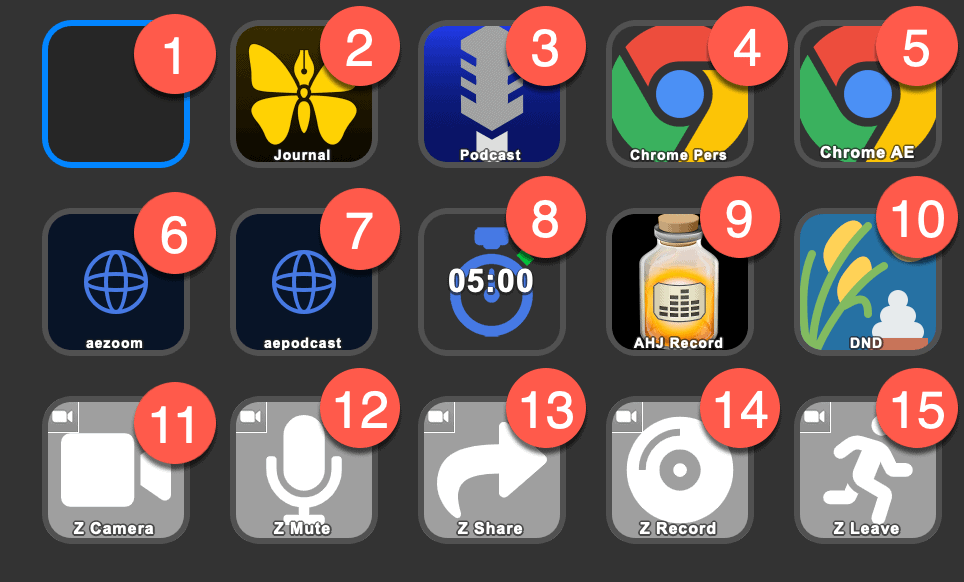
1: Blank
Will likely point to a Folder or Profile in the future. I left it blank for future use. Here’s where I’m really feeling the 15-button limit!
2: Morning Journaling Setup
The first thing I do when I log in to my computer is press this button. It fires off a Keyboard Maestro automation that does the following:
- Activate OmniFocus (my task manager)
- Hits ⌘-7, the keyboard shortcut to show Completed tasks
- Closes the OmniFocus inspector, closes the Sidebar, and moves the window to the right-side of the screen
- Activates Ulysses (my writing app, where I am writing this and where I also happen to keep my Journal)
- Move the Windows to the left-hand side of my screen
- Jump to my Journal group in Ulysses
- Create a new Sheet in Ulysses
- Hits ⌘-3, the Ulysses shortcut to go to focused writing mode
- Types out my Journaling Prompt, which also positions the cursor to the top
That’s a lot for one button! You can see there is then no friction to my doing my Journal. I hit 1 button and I can see what I did yesterday, and my cursor is ready to type my journal today.
3: Podcast Setup
There’s a lot I need to set up when we’re about to record The Productivity Show. Having most of it wrapped up in this button helps: then everything is ready to go, and I can just focus on getting ready to record a good show. This also uses Keyboard Maestro to:
- Asks which episode number I’m recording
- Activates my recording software and moves it to the top of my second monitor
- Moves Slack to the bottom of my second monitor
- Opens Google Chrome, opens it up to Google Docs and searches for the shownotes for this episode number so it is ready to open. Moves the Shownotes window to the right of my primary minter.
- Creates a folder in our podcast editor’s Dropbox for this episode number
I used to have it start the Podcast Zoom meeting too, but I found that often I want to do the setup before I want to go into the room itself. So now I move that to a separate button. I might change my mind.
4&5: Swap Google Chrome Profiles
I use different Chrome Profiles for my personal and Asian Efficiency stuff, and I am forever swapping between them through the day.
I got annoyed with navigating menus to do that, so I created a Keyboard Maestro macro to do that for me. Then I added Stream Deck buttons to swap between them.
This is a perfect example of automation that is so simple, but I love it so much.
6&7: Start Zoom Meetings
We have specific URLs for our internal AE meetings and recording The Productivity Show. These buttons go to those URLs, so I can just hit a button to go straight into Zoom.
8: Countdown Timer
As mentioned before, this uses the custom Countdown Timer plugin. Press the button once and it starts counting down with a little automation. Press within 1.5s and it ads 5 minutes. Press it again and it stops. Press it again within 1.5s and it resets.
Simple but I like it.
9: Start Podcast Recording
Fires off a Keyboard Maestro that starts up Audio Hijack and hits the Record keyboard shortcut.
Now that I think about it, I don’t really need KM for this. Might refactor and simplify later.
10: Turn on Do Not Disturb
As the name says, turns on macOS’s Do Not Disturb feature. Uses the Hotkey action to send a keyboard shortcut that I defined in System Preferences > Keyboard > Shortcuts > Mission Control > Turn Do Not Disturb On/Off.
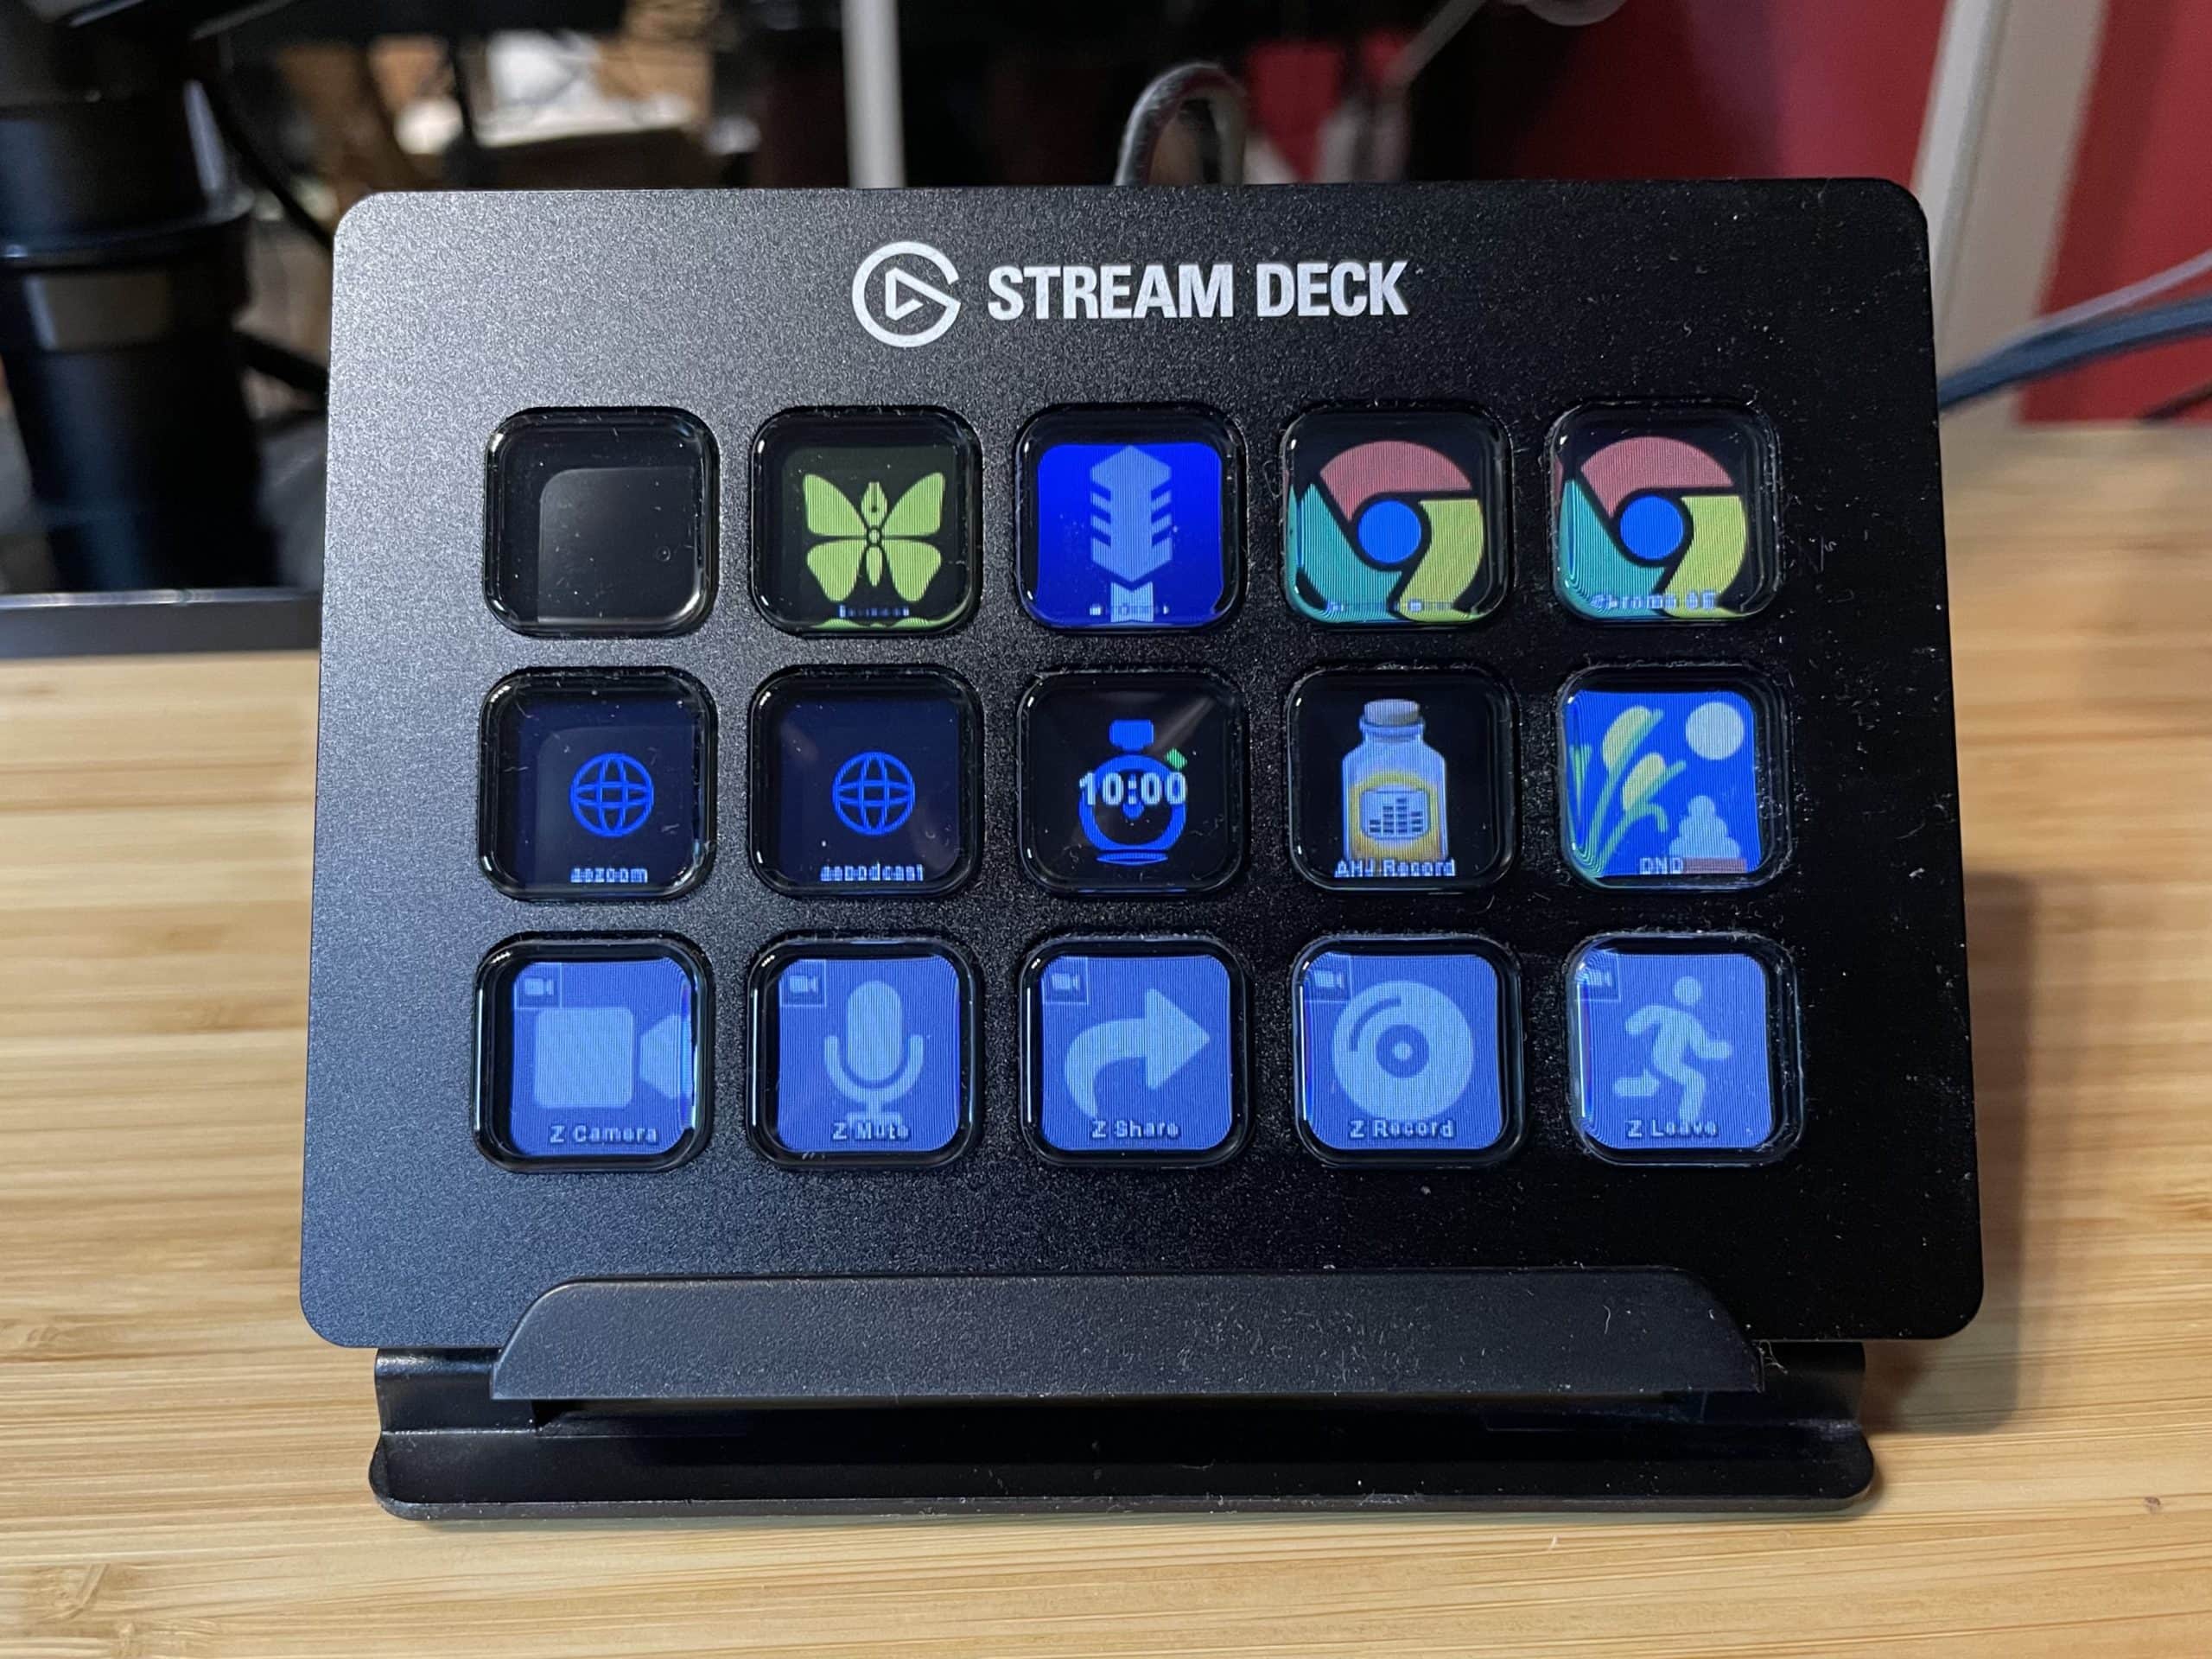
11-15: Controls Zoom
These buttons come from the Zoom plugin that can be found in the Stream Deck Store. In order:
- Turn Camera On/Off
- Mute/Unmute Mic
- Start/Stop Screen Share
- Start/Stop Computer Recording
- Leave
It can do much more, but these are the features I use. I like this plugin because the buttons change based on on/off state, so you can see right away if you are muted/unmuted/etc.
For example, here is a picture I took during this morning’s Daily Huddle when I should have been listening to Thanh:
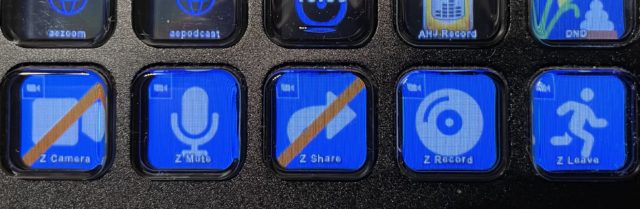
You can see that since I am in an active Zoom call, my buttons are blue instead of gray, and you can see my camera, mute, recording, and sharing status.
What’s Next For Me?
My next steps are to add more “Setups” so that I can have more one-button control when I am switching roles and workflows. I will probably move those Zoom buttons into a folder, since they take up a whole row.
Then again, despite what I said earlier, maybe that is a good excuse to upgrade to a 32-button model. Tempting…
Do You Need A Stream Deck?
Do you need a Stream Deck? Well, unless you are a live streamer, I’d say of course you don’t need one.
It is not like I am unproductive when I am away from my desk and therefore away from my Stream Deck. I don’t take it travelling with me. I can work from anywhere.
So, while I don’t need my Stream Deck, I do love my Stream Deck and would buy it again in a heartbeat. My skepticism from a year ago was completely unfounded.
The Setup buttons alone make it worth it to me, and over the next white, I plan to use Profiles and Folders, and other plugins to expand my use even more.
Any questions or favorite Stream Deck productivity tips, let us know on social media or leave a comment below.
My biggest time saver so far is a button that opens Stream Deck program to edit its configuration.
I bought a stream deck through Facebook Marketplace. Love it so much that I splurged and bought a Stream Deck XL. I'll probably sell the little one but for now I can use one for my desktop and one for my laptop. If you use Finale and Keyboard Maestro you can save a lot of mousing around.
Great and handy article. I purchased a Stream Deck based on your recommendation. Only have 3 folders programmed so far and I am loving this device.