2020 was the year everyone learned about the video conferencing tool Zoom.
Up until then, it was primarily used in business settings for virtual team meetings, which didn’t happen all that frequently in most companies. Then everyone was forced to work from home due to COVID-19 and Zoom became essential.
But Zoom isn’t just for businesses. People use Zoom for all sorts of purposes, including virtual family gatherings, online trivia nights, and catching up with friends.
For some, learning how to use Zoom video can feel intimidating at first, especially when you don’t fully understand the technical terms used when talking about it. When you hear that Zoom is a “cloud-based video conferencing tool”, you may simply tune out because using Zoom sounds too complicated.
The good news is that using Zoom is really simple, and this guide is here to help you through it step-by-step.
By the end, you’ll know how to use Zoom like a pro, including some of the advanced features most people don’t even know about!
Let’s get started.
Getting Started: Creating a Zoom Account
Zoom is a cloud-based video conferencing tool, which is a fancy way of saying that it runs on the internet. That means that you can use it from any computer or mobile device (smartphone, tablet, etc.).
To be part of a Zoom meeting, you’ll need internet access and a microphone. While Zoom is known best for video conferencing, a webcam is optional. You can also call into a Zoom meeting via phone number, but for the sake of this guide, we’re going to assume you have access to a smartphone or computer.
The first step in using Zoom is creating an account.
Creating An Account On Desktop
On any Windows, Macintosh, or Linux desktop or laptop computer, visit https://zoom.us with your chosen web browser.
Click the bright orange sign-up button to get started.
Due to laws in various jurisdictions, they will ask you to enter your birthdate.

After confirming your birthdate, the signup page appears.
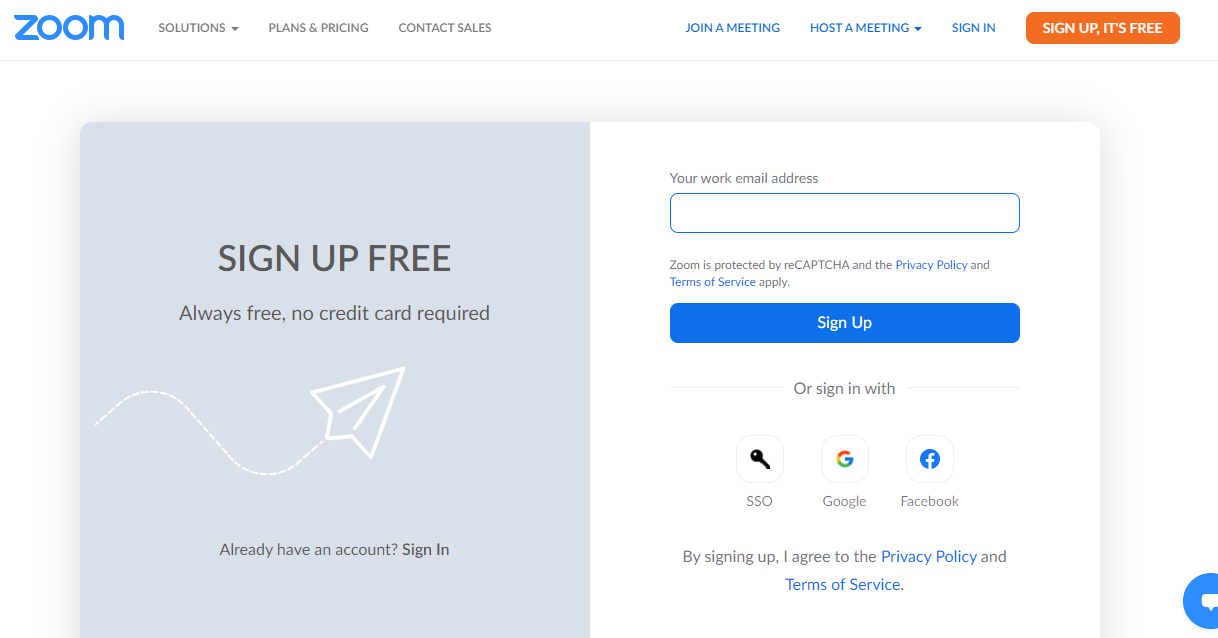
General accounts with Zoom are completely free, and you can quickly create an account using your standard Google or Facebook login.
(Note: with free accounts, you can only host a Zoom meeting that is 40 minutes or less. You can attend a Zoom meeting hosted by someone else for any length of time.)
If you’re creating the account for work purposes, however, you might want to use your work or business email account instead.
Once those initial steps are finished, you’ll land on the Zoom main account page.

Creating A Zoom Account On Mobile
Zoom is also quite simple to use from any modern Apple or Android mobile device. The screens may vary slightly, but they all serve the same purpose.
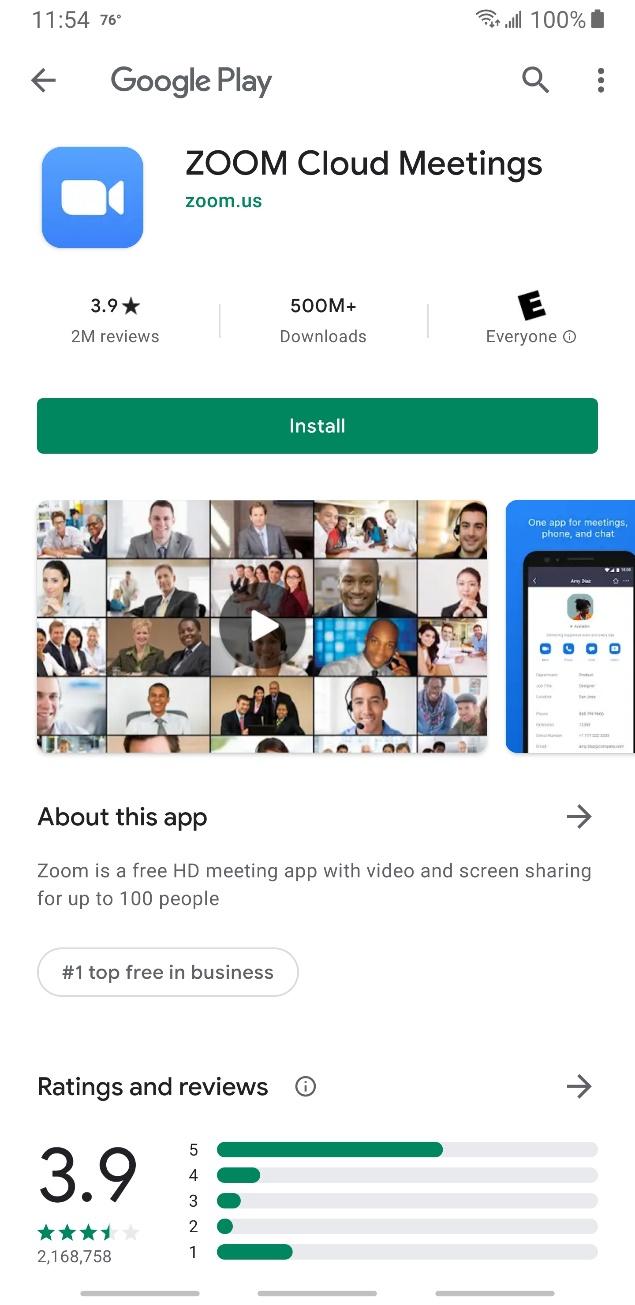
If you click on a Zoom link and you don’t have the Zoom app installed on your device, you’ll be prompted to download the app.
Simply download and install the Zoom app, then follow the signup or login prompts as you did on the desktop.

How To Host A Zoom Meeting
One of the reasons Zoom has become popular is that using Zoom is really easy. Hosting a Zoom meeting is as simple as clicking a link.
From A Computer
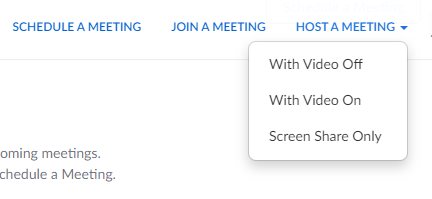
To use Zoom on a computer, you’ll need to download the Zoom desktop app first. Once you’ve logged in on a computer browser, simply click the “Host a Meeting” link on the top-right menu bar. You’ll get a drop-down menu that lets you choose whether the meeting will be with or without video. You can also share your screen only. The share your screen only option is useful for webinars, classes, and other presentations.
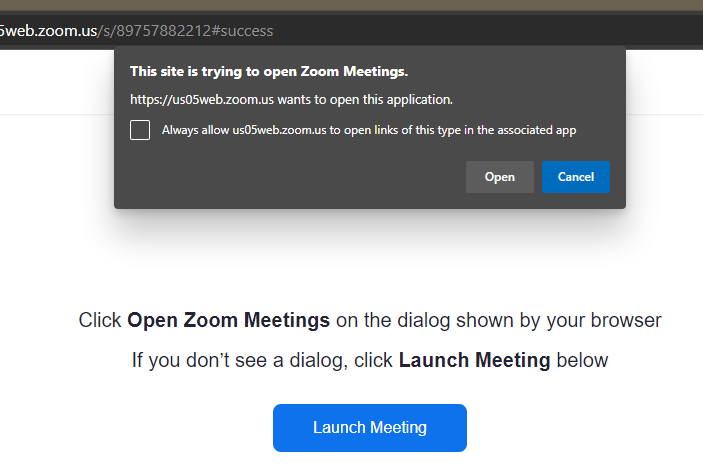
After selecting the type of session you want to host, you may receive a pop-up notice in your browser telling you that it’s trying to open the Zoom desktop app. If you have not installed Zoom yet, you’ll be asked to do so. If you have installed it, just click “Open” to give permission to open the desktop app on your computer.
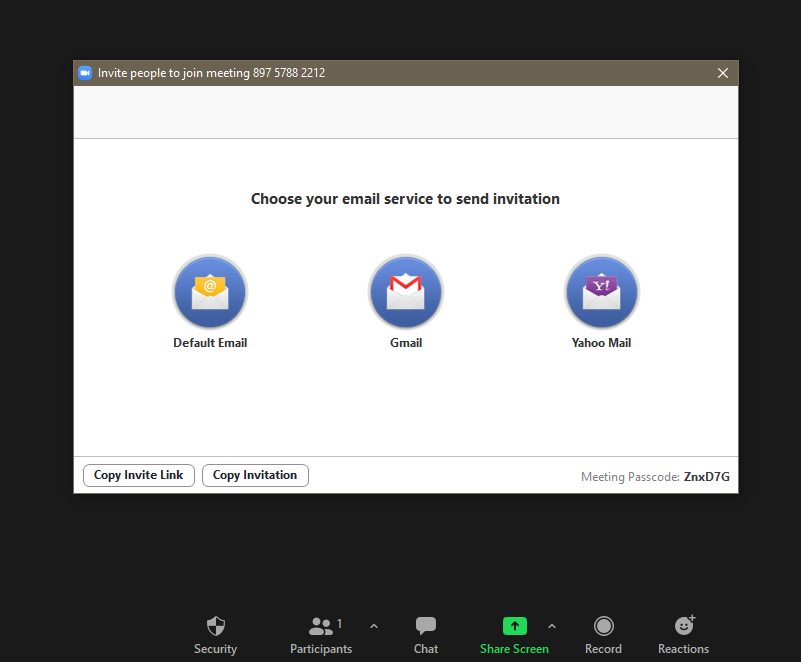
Once you’re inside the meeting room, you can invite other meeting participants to join you. Simply click the Participants icon at the bottom of the screen, and a window pops up that allows you to select contacts from your email list.
Alternatively, you can click on “Copy Invite Link” and then share the link in some other way, like over Slack or via text. You can also give people your personal meeting ID, which they can then use to join your Zoom meeting.
Mobile
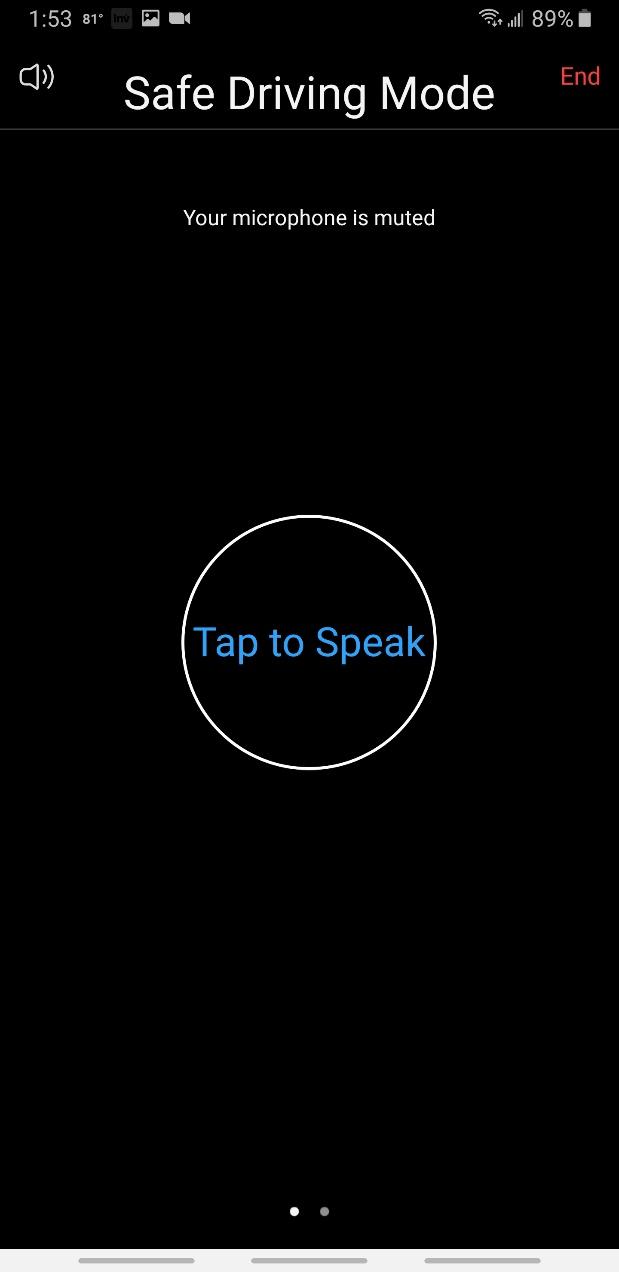
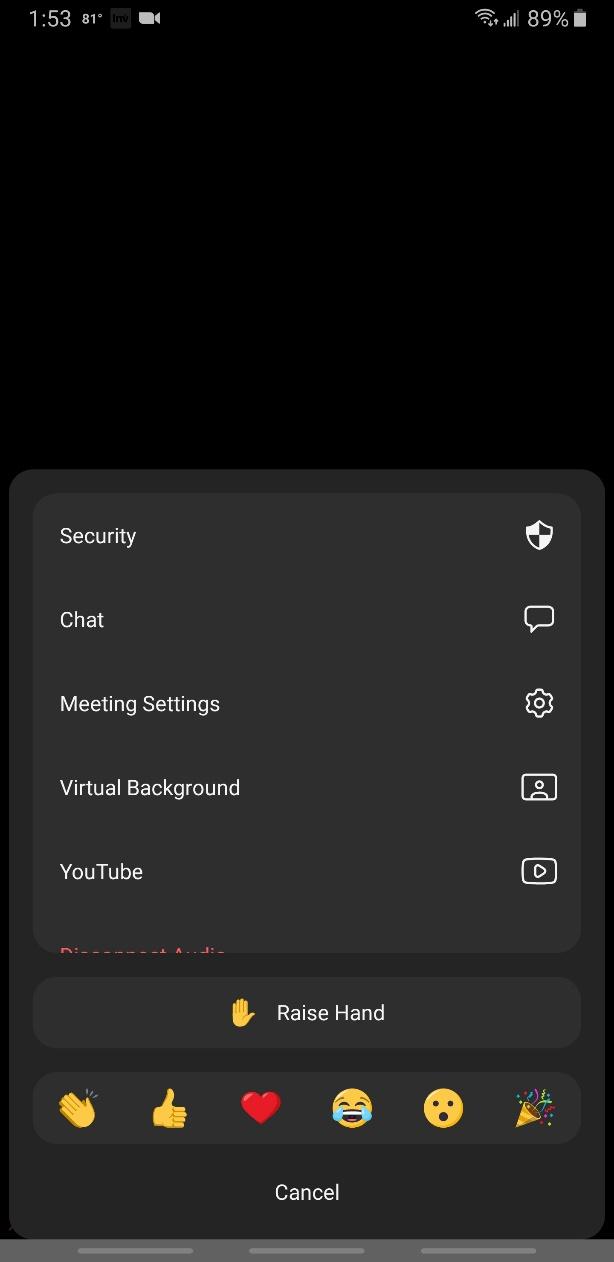
Hosting a Zoom meeting with the Zoom mobile app is quite similar. Simply launch the installed Zoom app, log in, and tap the New Meeting icon. Once you’re inside the Zoom meeting room, you’ll have a variety of options, including inviting others, starting a chat, or turning on the safe driving mode.
How To Join A Meeting
Joining a Zoom meeting hosted by someone else is almost the exact same process as hosting one. If you receive an invitation, you can click the invitation link, either on mobile or desktop, and be taken directly to the meeting room. You do not have to create an account if you’re only joining a meeting.
If you do have an account and you have the specific meeting ID number instead, simply log in to your account first.
On the desktop version, click the “Join a Meeting” option in the top-right menu. On mobile, click the “Join” icon. In both cases, you’ll need to enter the Meeting ID into the required field, then choose whether your microphone and camera should be on or off when entering the meeting.
Features to Use During Zoom Meetings
Once you’re in a meeting, there are a variety of features you’ll want to experiment and become familiar with. These are designed to make group gatherings run smoothly.
Mute/Unmute Your Audio
Whether you’re hosting or attending a meeting, it’s a good practice to always mute your audio when you’re not speaking. This helps you avoid causing unwanted distractions, like when a dog starts barking in the background or a housemate yells for you.
To mute and unmute yourself, simply click the microphone icon at the bottom of your screen. If it has a line through it, you’re muted. You can also use the spacebar, but instead of toggling it, hold it down while you’re speaking, then release it when you’re not.
Mute/Unmute Others
When hosting a meeting, you can mute and unmute attendees as needed. This is useful to prevent distractions and interruptions during a presentation, and to allow for orderly speaking turns.
Simply click the participants’ icon and choose Mute All. You can also mute individuals if they have background noise or some other distraction.
Turn Video On/Off
Turning the video feed on or off is also as simple as clicking an icon. Sometimes turning the video off will help if there are technical issues, such as a lagging connection.
Other times, there is simply no need for participants to have their cameras on. Whatever the reason, simply click—or tap on mobile—the camera icon to toggle it on or off. When there is a diagonal line through the icon, the video is turned off. Also, your image on the screen will be black and only show your name.
A quick keyboard command is available too. On Windows, press Alt+V simultaneously to toggle the video. On Macintosh, or on an iPad with a keyboard, press Command+Shift+V simultaneously.
Chat
Chat is an excellent way to encourage collaboration and participation in events. This is particularly useful for webinars and presentations, as it allows attendees to ask questions without interrupting vocally. It’s also an excellent way to share files, annotated images, and more.
To open the chat window, click the small chat icon at the bottom of the screen. You can then send messages to everyone in the meeting or specific individuals. You can also share resources, like links, files, etc.
Share Screen
Sharing your screen is a useful feature during presentations, classes, and design sessions. It can even be used as a technical support tool when someone is having issues.
To share your screen, click the “Share Screen” button at the bottom of the screen. You then can choose whether to share your whole screen, specific applications, a whiteboard, etc.
Hotkeys
Hotkeys, or keyboard shortcuts, are a powerful tool worth learning—especially if you host and/or attend a lot of Zoom meetings.
Being able to switch screens, toggle video or audio on and off, send files, and so on, is quicker when you simply press a keyboard combination because you don’t need to move your hands to the mouse or navigate various menu options to find what you’re looking for.
For a detailed list of hotkeys and shortcuts, check out this guide from Zoom.
How To Schedule Zoom Meetings
Scheduling Zoom meetings is quite useful, particularly if you have a presentation, class, interviews, or team collaboration routinely. On a desktop computer, simply log in to your Zoom account, and click the “Schedule a Meeting” link in the top-right menu. This takes you to the scheduling page, where you can pre-set a variety of options.
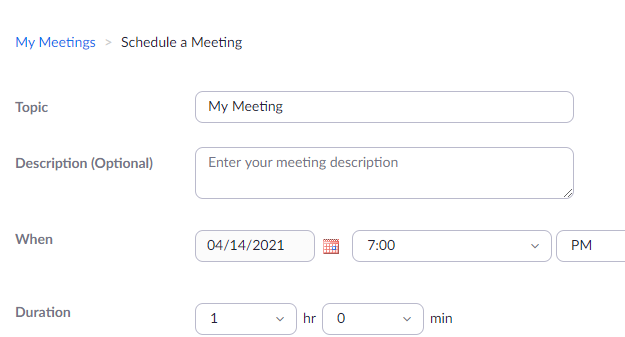
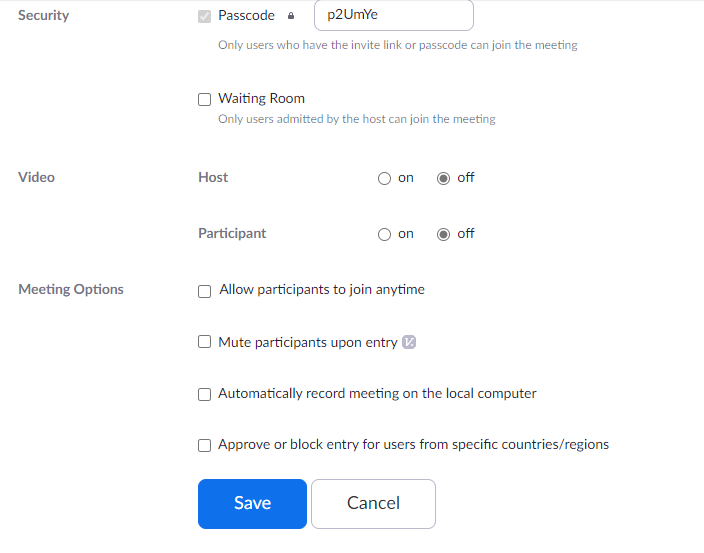
In addition to the date and time of your meeting, you can make it recurring. You can also assign a password, set recording options, choose whether attendees are muted when they enter the room, and more.
This feature is available to all Zoom accounts. However, if you’re on the Basic (Free) plan, then your meeting is limited to 40 minutes when you have 3 or more people participating.
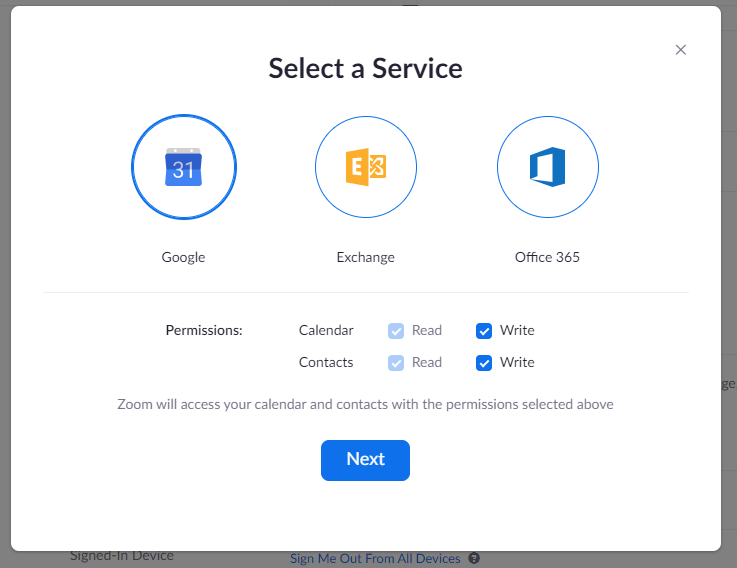
Scheduling From Google or Outlook
Zoom has plugins that can be used that enable you to schedule Zoom meetings directly from Google Calendar and Outlook. These are easily accessed from the web-based client through your main dashboard scheduling screen. If you’re using Google Calendar, make sure to download either the Chrome or Firefox extensions first.
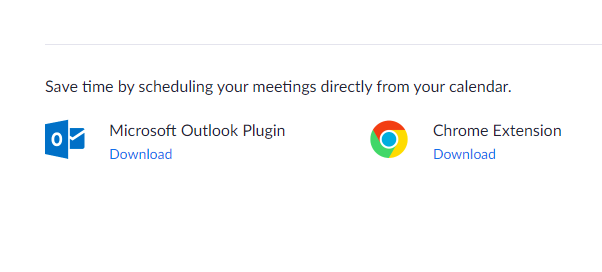
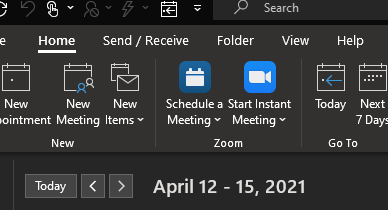
In the desktop version of Outlook, Zoom installs as a plugin that you can access from your main Home Tab on the ribbon toolbar.
Once you’ve downloaded and installed the proper extension or plugin, follow these steps for scheduling with Google Calendar and these steps for Outlook.
How To Record A Meeting In Zoom
Recording a meeting is useful for a number of reasons, including legal compliance, training and tutorials, and creating digital products for later lead generation and sales.
Whatever your reason for recording a meeting, as a host you may be legally required to disclose to your attendees that you will be recording. Laws vary from one country to another, and even sometimes between jurisdictions of an individual country, so full disclosure is best practice.
To record your meeting, simply tap or click the record button when you’re hosting a meeting. Depending upon the device you’re using, you may be prompted to choose between storing your recorded meeting in the cloud or locally on your computer.
Pro Tips For A Better Zoom Experience
Now that you know the basics of how to use Zoom, let’s talk about some specific things you can do to improve your overall experience.
Change your background
Whether hosting or attending meetings online, one of the benefits is that you can be physically located anywhere. However, sometimes your surroundings may be less than attractive. Or maybe you simply don’t want to share that much of your personal life with others attending the same Zoom meeting.
This is where Zoom backgrounds can be useful. Using the built-in scenery, you can easily hide what’s actually behind or around you. So if you work from a small, dark closet, or your roommate didn’t clean up from their party the night before, no one needs to know!
You can change your Zoom background to be a grassy field, a pretty ocean sunset, or just about any other image.
Create Recurring Meetings
Whether you hold class every Tuesday, or you lead a company meeting every Monday, creating recurring meetings saves you the time of having to manually schedule every single one. Zoom makes scheduling these easier with a recurring meeting feature built-in.
Click “Schedule a Meeting” and you’ll be presented with the standard meeting scheduling page in Zoom. Click the “recurring meeting” checkbox and you’re presented with multiple scheduling options for the future.

Choose the frequency, days, time, etc. as needed and pre-configure your standard meeting preferences (mute all, security code, etc.) then click the save button at the bottom. Now you have your routine meetings scheduled and there’s no need to continuously input the same details each time.
Create a Waiting Room
Whether you’ve heard about Zoombombing or not, you need to be aware that it exists. Zoombombing is when an uninvited person shows up in your meeting, and usually, they are there to cause chaos.
It’s the modern-day equivalent to crashing a party, and it can be a big problem for certain types of meetings.
Zoomboming can happen mistakenly from someone mistyping a Meeting ID into the join box but often occurs when people are purposely typing random IDs in to see if they can access a meeting room. Once they hack into a room, there’s no telling what they might do. You definitely want to keep random strangers out of your meetings.
You can protect your meetings and events by creating a waiting room. A waiting room puts up a basic welcome page for attendees when they arrive for the meeting, and you can let them into the live event one at a time.
Not only does this ensure more security, but it’s also an easy way to mark attendance for mandatory or educational events. An additional way to add security is to create a password for entry. However, that may open room for technical errors with new or inexperienced users.
Integrate Additional Apps from the Marketplace
You can expand the power of Zoom meetings and presentations by connecting with other apps through the extensive marketplace. Zoom’s app marketplace has hundreds of applications designed to make your life easier by automating and integrating tools together.
For example, there are transcription and closed-captioning tools. Captioning your Zoom content meets federal accessibility compliance laws, and you can add an app that creates the captions for you automatically.
Similar apps help you create notes and summaries from your Zoom meetings, and still, others enable you to capture those notes into popular notebook tools such as Evernote.
An app that ties Microsoft Teams together with Zoom makes it easy to schedule and attend Zoom meetings and calls directly from Teams.
A combination of apps can streamline scheduling job applicants, getting documents signed when they’re hired, and managing projects with them through tools like Asana.
Whether you use one add-on app from the marketplace or you string multiple ones together, you’ll be making the most of Zoom in no time.
Collect Contact Info from Attendees
With a Zoom Pro level account or higher, you can require each meeting participant to register before joining the meeting.
You can even customize the contact information collected so it’s tailored to your specific needs. This is an excellent way to ensure students attend class or employees attend mandatory events. It’s also extremely useful for lead generation when giving a presentation or hosting a webinar.
Click “Schedule a Meeting” and then check the box next to “Registration Required” to configure this option.
See All Who Attended
When using Zoom for education, career-building, mandatory company meetings, and the like, being able to see who all attended each event is an essential feature.
To use this feature, you must have a Zoom Pro account or higher, and you must turn on registration for the meeting. With the appropriate permissions, you can run an attendance report 30-60 minutes after the meeting has finished. Not only can you see who attended, but you can also see who stayed the entire time.
Log in to your Zoom dashboard and click the Reports link in the left navigation bar. Select the meeting you want to view attendance reports for and export it to your preferred spreadsheet format.
If you’re on a free Zoom account, you can manually collect attendance information using the chat feature. Simply ask everyone to write their name into the chat as proof of their presence, then save the chat log and open it in your preferred spreadsheet tool. This may not allow you to see who stayed for the entire session, however, it could be helpful in a pinch.
Time To Zoom
As you’ve come to realize in reading this guide, Zoom is an extremely powerful and practical online tool that can be used in any number of ways. Educational institutes are using it to conduct classes, companies are using it for brainstorming sessions and work from home water cooler chats, and families are using it to watch the new baby grow up while Grandma and Grandpa stay safely quarantined.
This software empowers people to work and live wherever they’d like while still hearing, seeing, sharing, and collaborating even if all they have is the simple phone in their hand. I hope this comprehensive guide has reassured you that it really is that easy and encouraged you to give it a try yourself.
Recommended for you
Want the full system? 25X is the flagship productivity system we teach.
Explore 25X →